How to add a feed (dynamic data) to the banners.
Before you can create a feeded banner, you need to create a new feed, which will be used in your bannersets.
Learn how to do this:
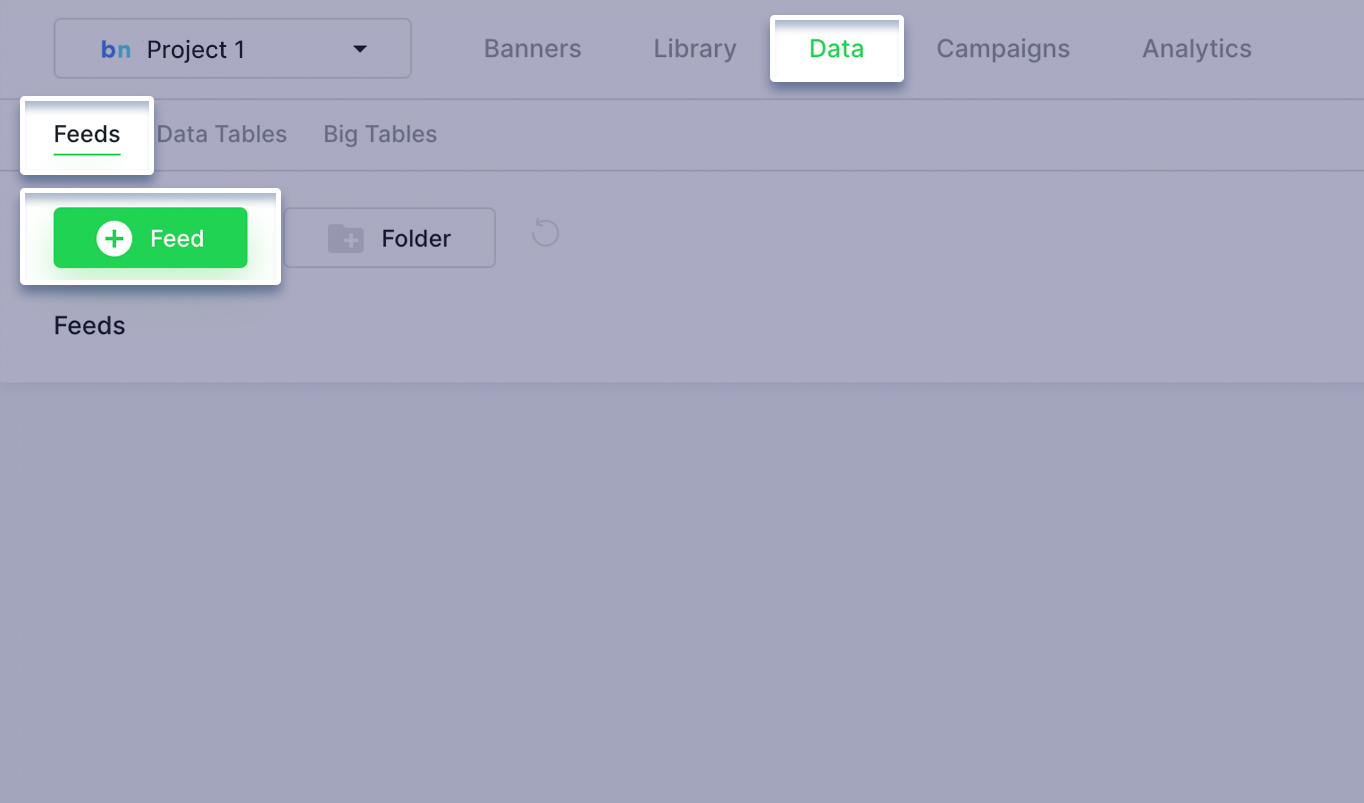
Go to the Data > Feeds and click on the Add a New Feed button.
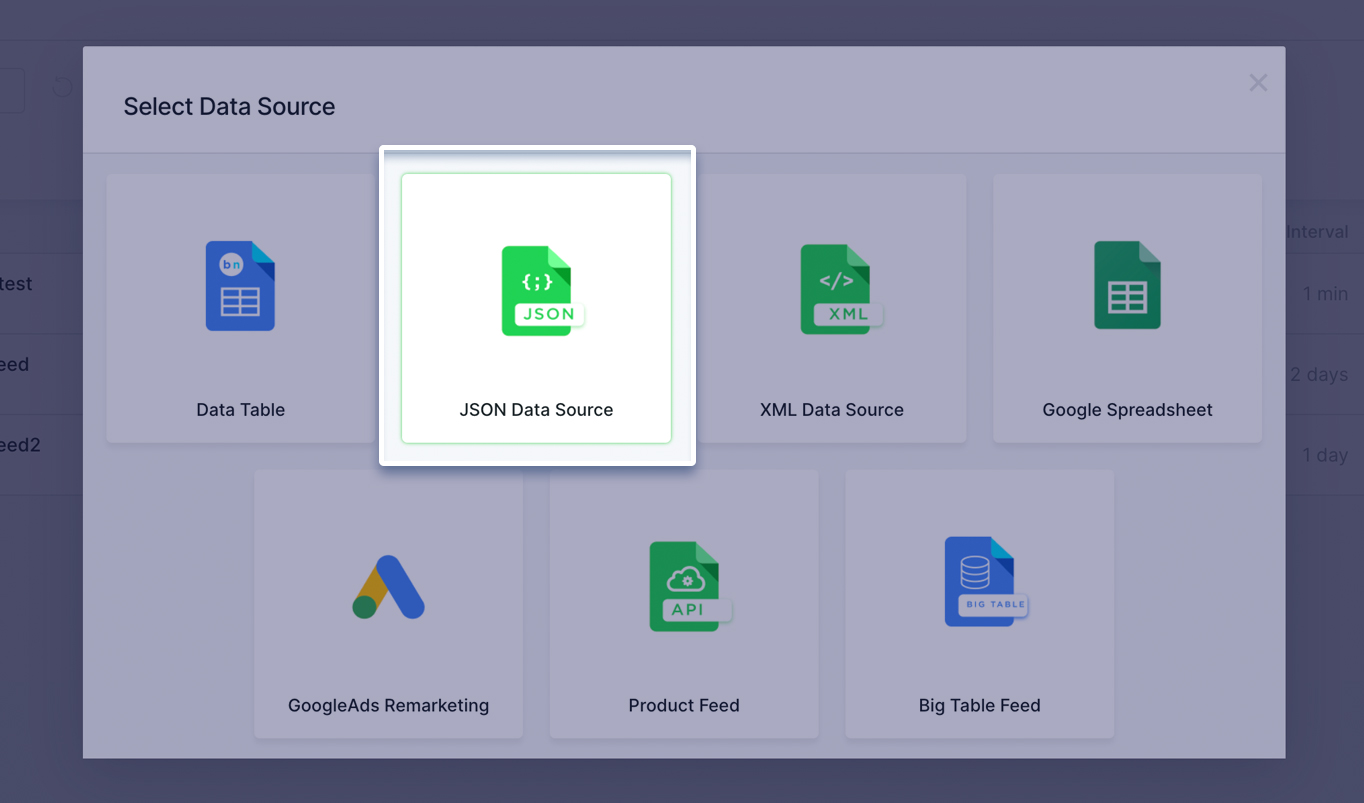
From Select Data Source dialog select JSON.
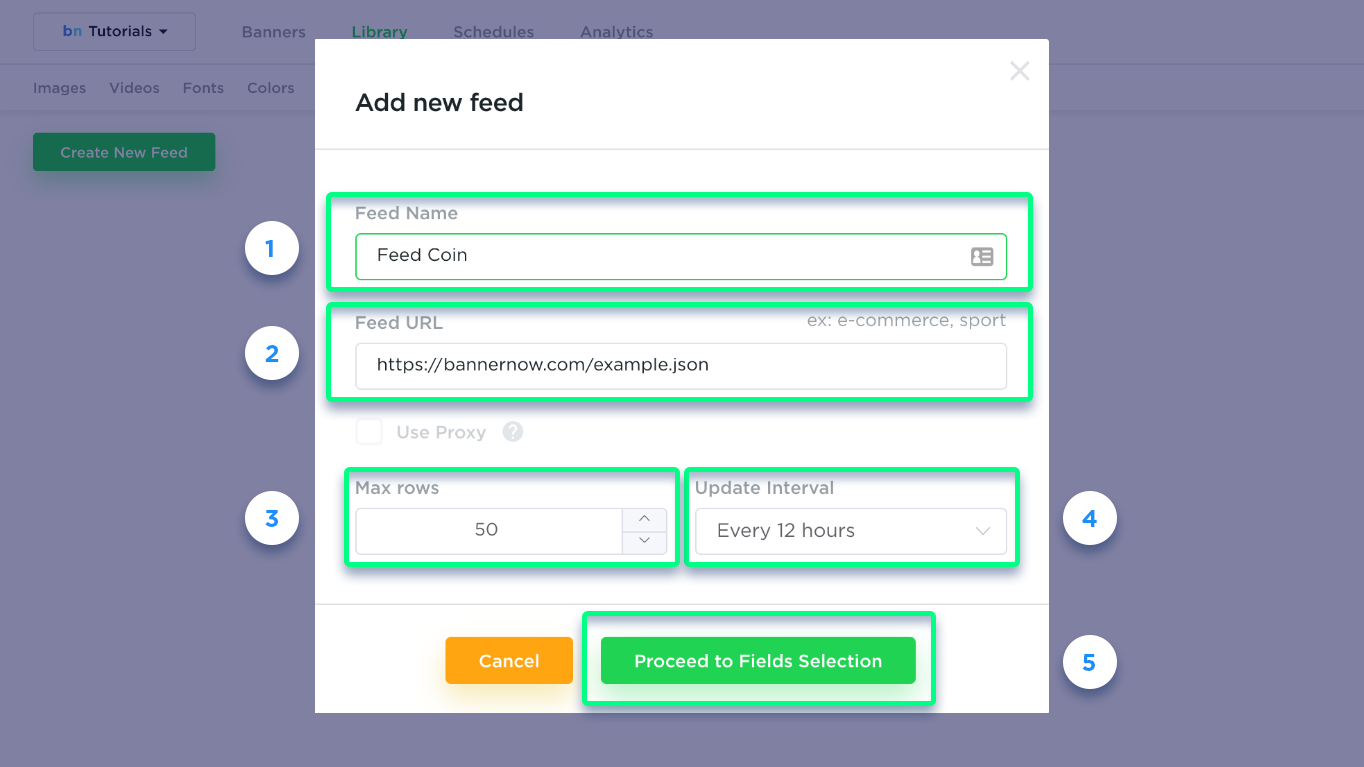
Fill in all the required input fields:
- In the “FEED NAME” input the feed’s title.
- In the “FEED URL” input the feed’s URL (XML or JSON). You”l also be able to use a Google Spreadsheet as a feed source.
- In the “MAX ROWS” input the limit number of max results/rows.
- Select the “UPDATE INTERVAL” – an interval that represents how often new data is fetched.
- Click the Proceed to fields selection, to go to the next step.
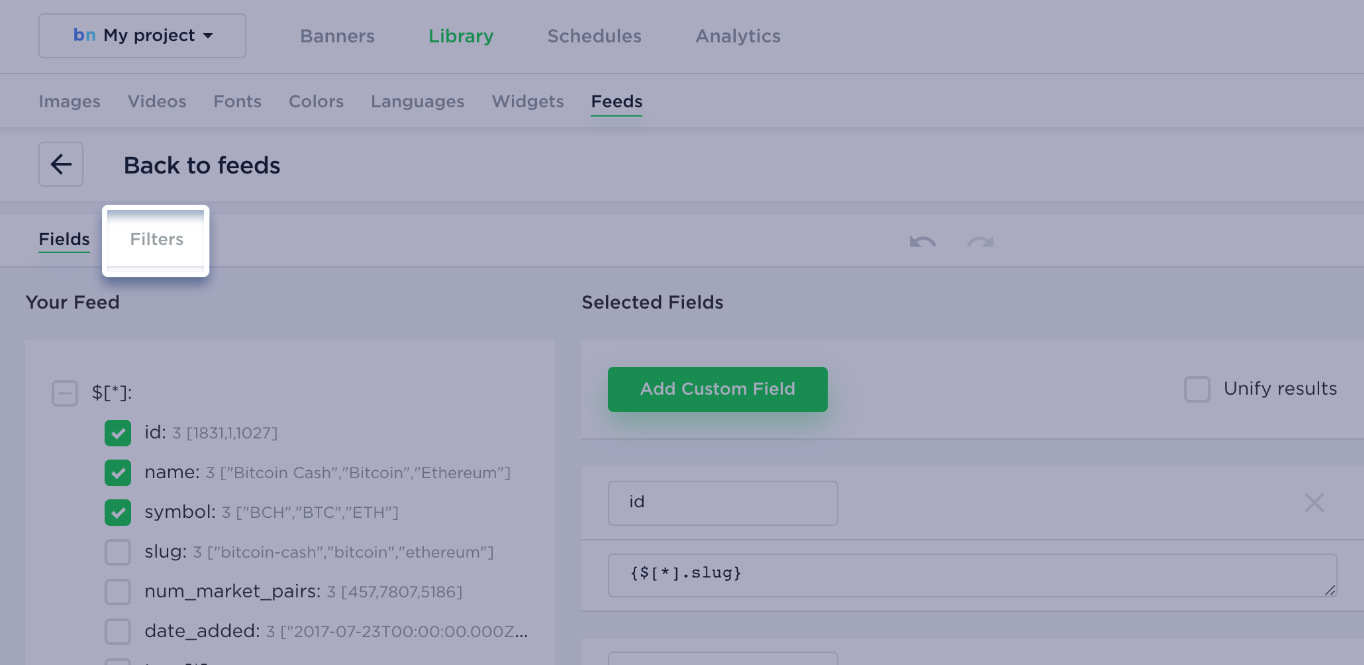
After your feed was parsed, select the data that can be accessed from inside the banner:
- Check the required fields in the left tree panel.
- The fields that you have selected will appear in the central panel (Selected Fields).
- You can use the jsonPath formula (read the documentation) if you need to select some specific data or to convert it into a different format (you can also contact us, we will gladly assist you with this). In this tutorial, we have used the UCASE({$[*].name}) formula to convert the name fields to uppercase strings. For the price_usd field we are using the NUMBER({$[*].price_usd}, ‘$0,0.00’) formula to display the price in the right format.
- You can also create a custom field manually by clicking the +Add Custom Field button.
- For the “img” custom field we will create a formula to help us to create a URL path to the image from the feed: ‘https://bannernow.com/demo/’+{$[*].id}+’.svg‘.
- Within the right panel, you’ll view the results accessible in your banners.

Use Filters:
Click the “Add New Filter” button.
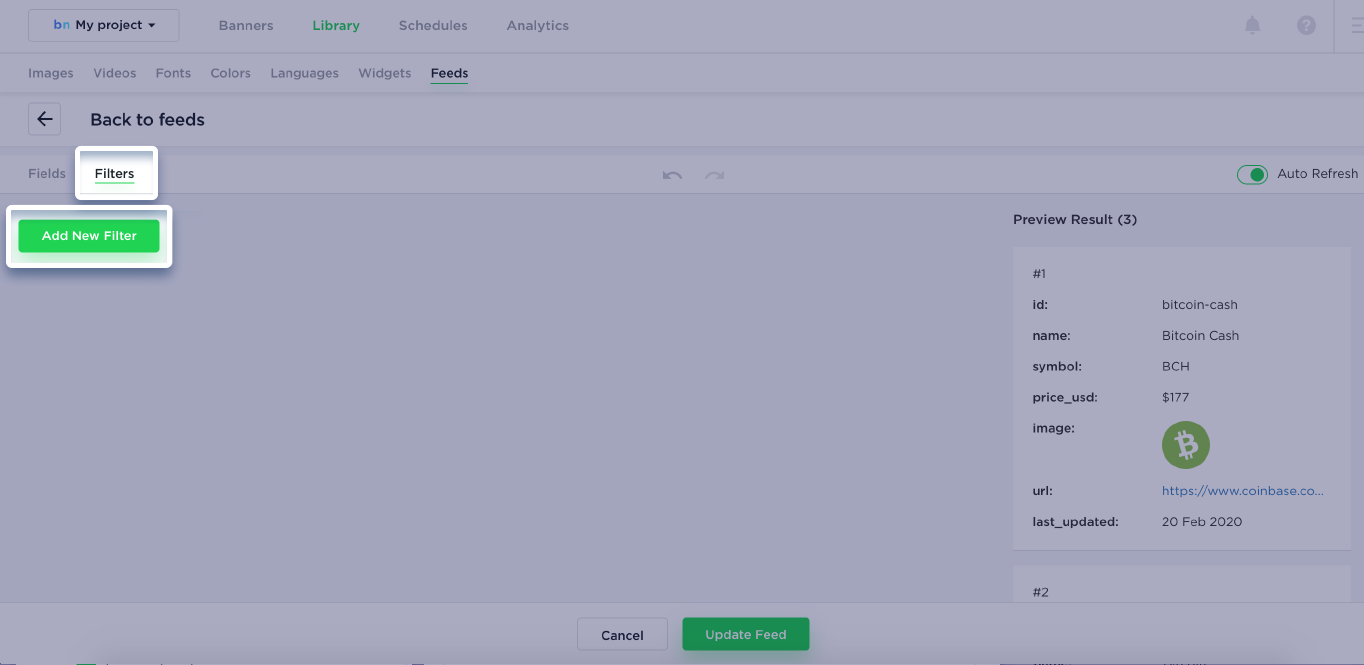
You can manipulate the feed results using the following filter types: Include, Exclude, Replace, Sort, Prioritize, Remove Duplicates, URL Fallback
Here is an example:
- Input filter title.
- Select the Sort filter.
- Select the filtering to sort by price.
- Field type (string, number, date).
- Operator (descending price).
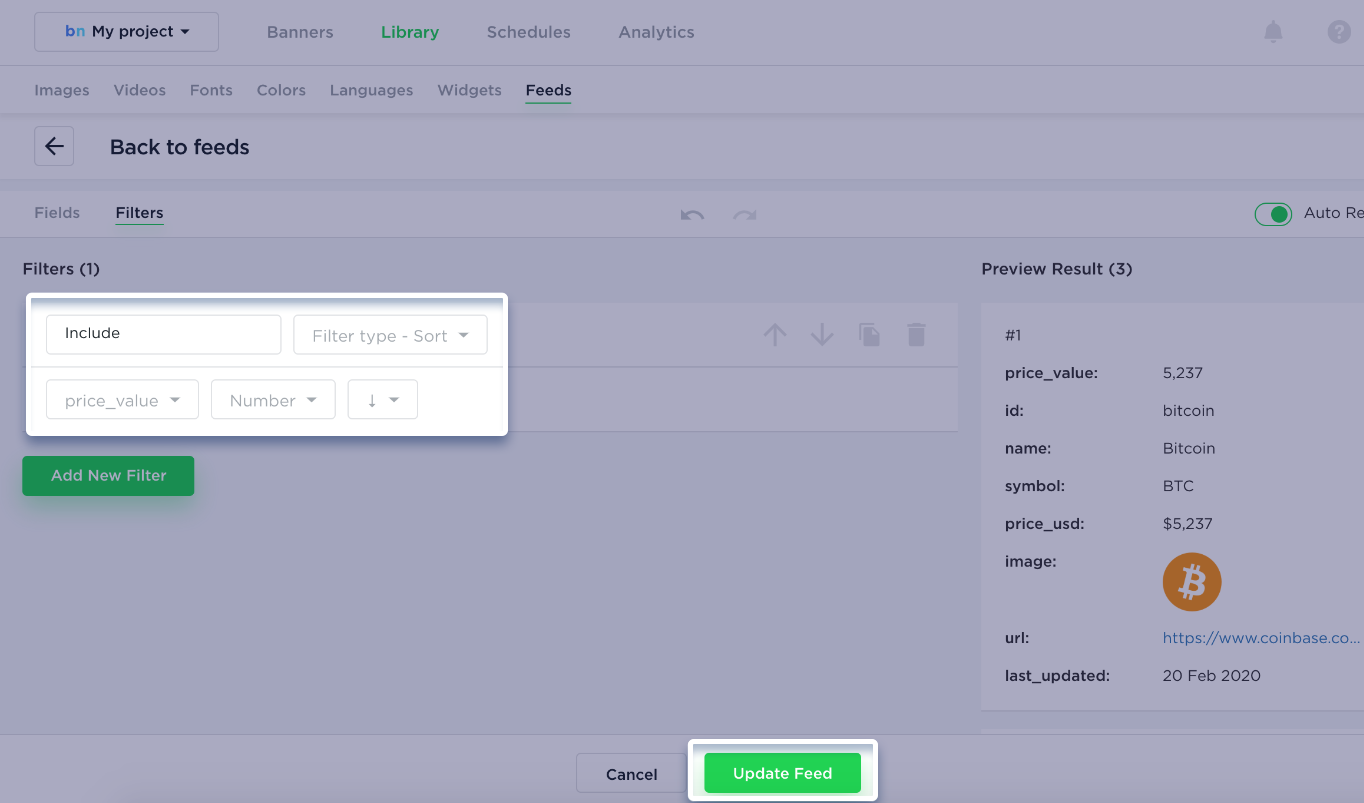
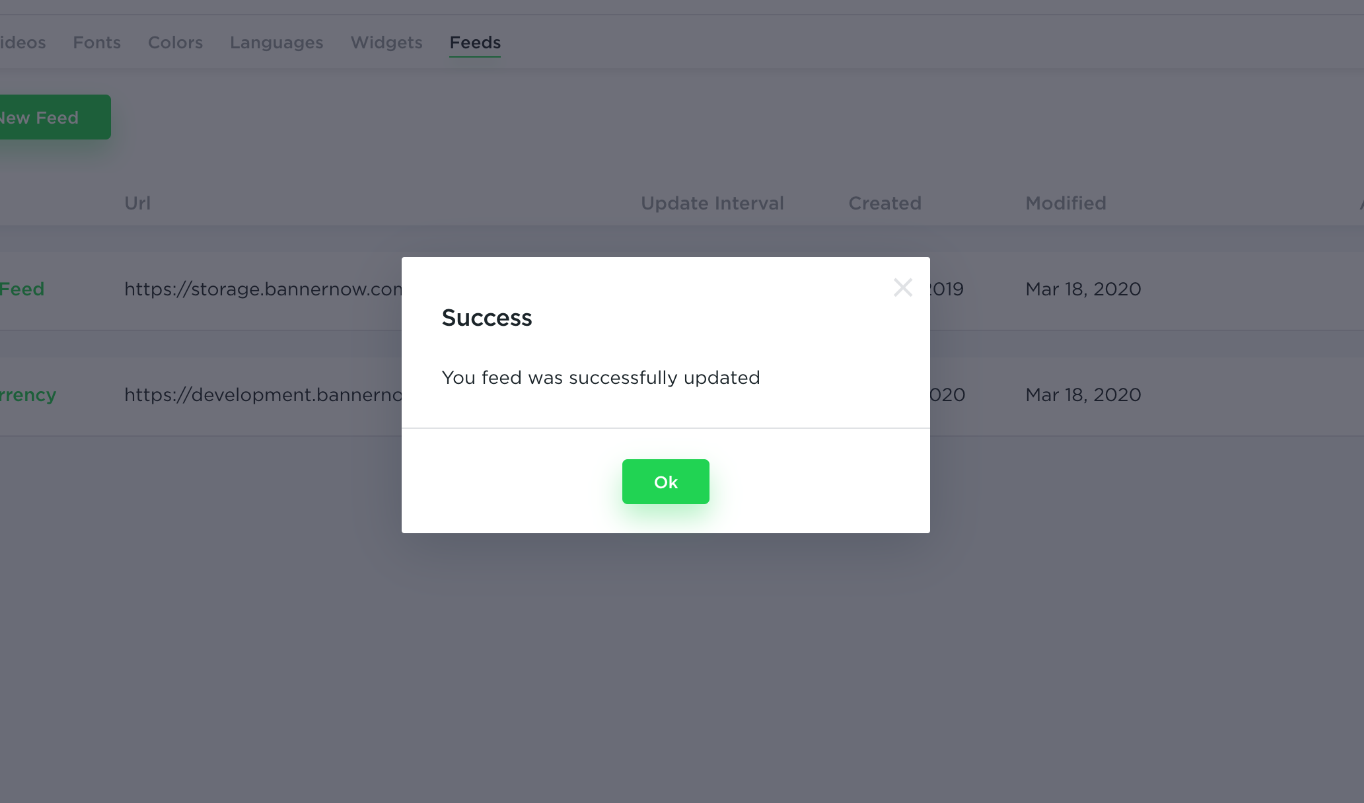
Click the “Update/Create Feed” to save it.
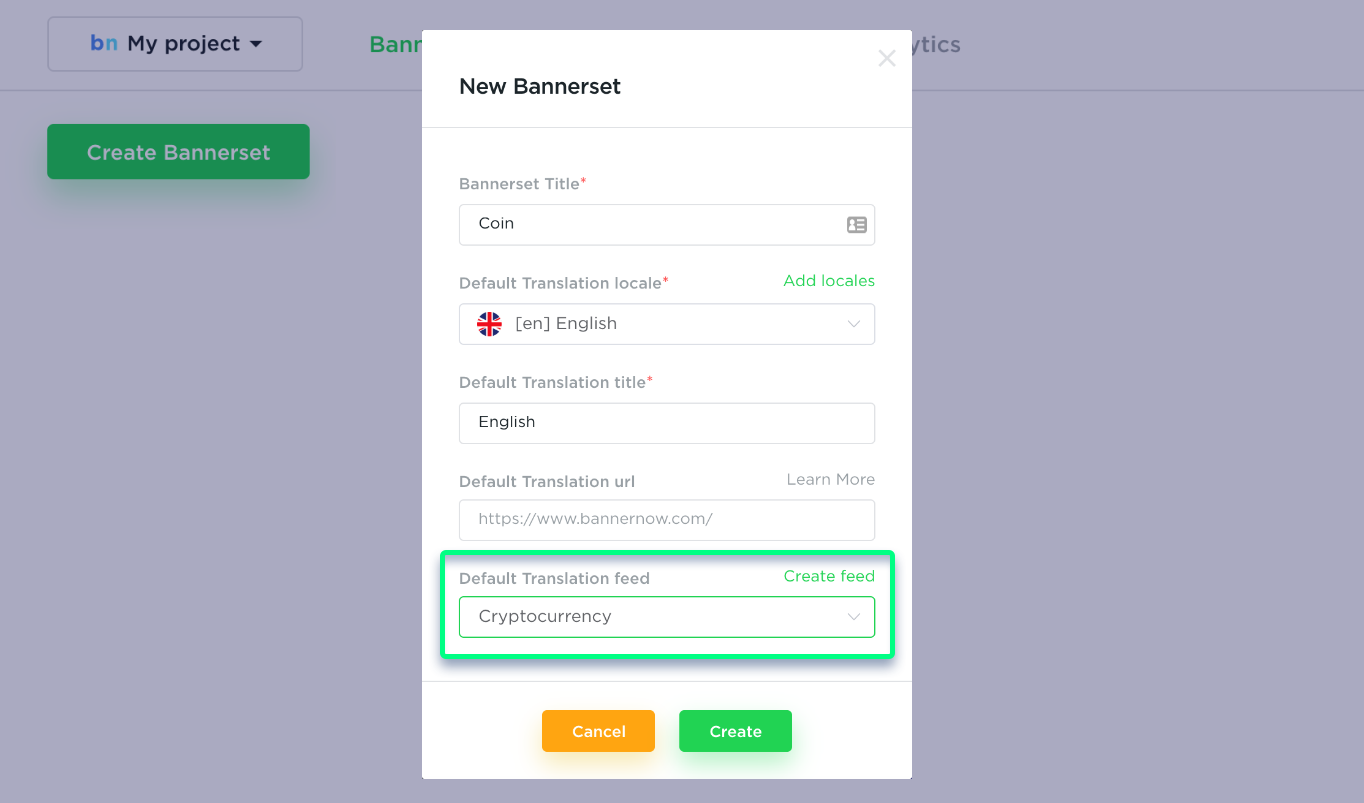
Create a new bannerset.
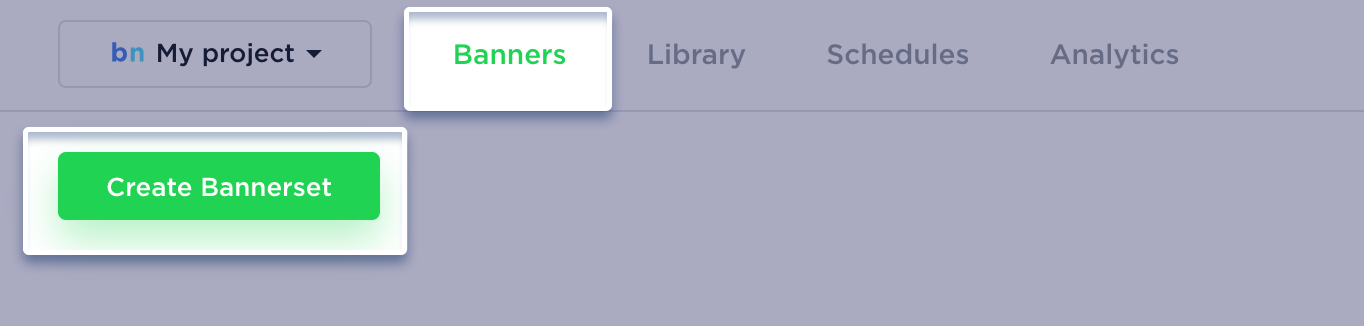
When creating a bannerset, input the title and select the feed source from the dropdown menu. After that, click the create button.
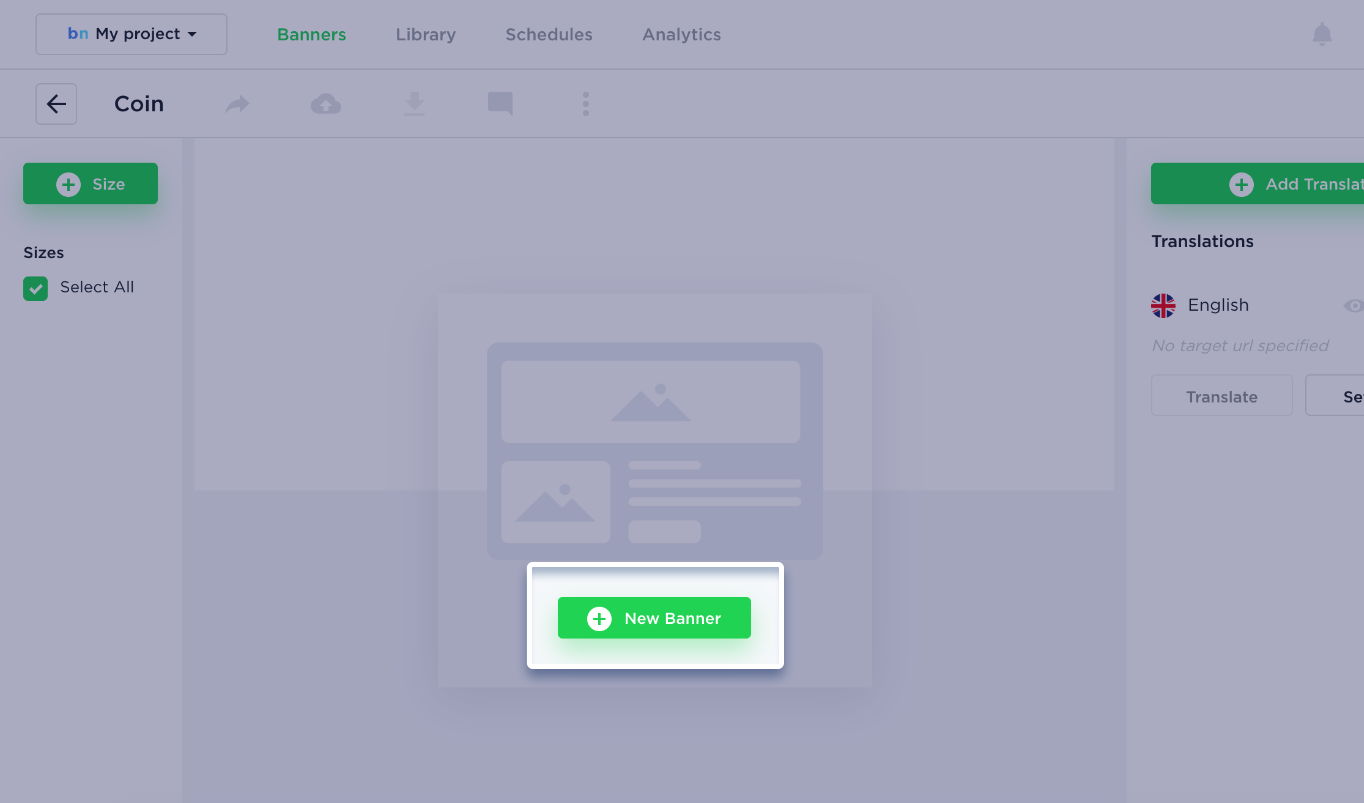
Create a new banner.
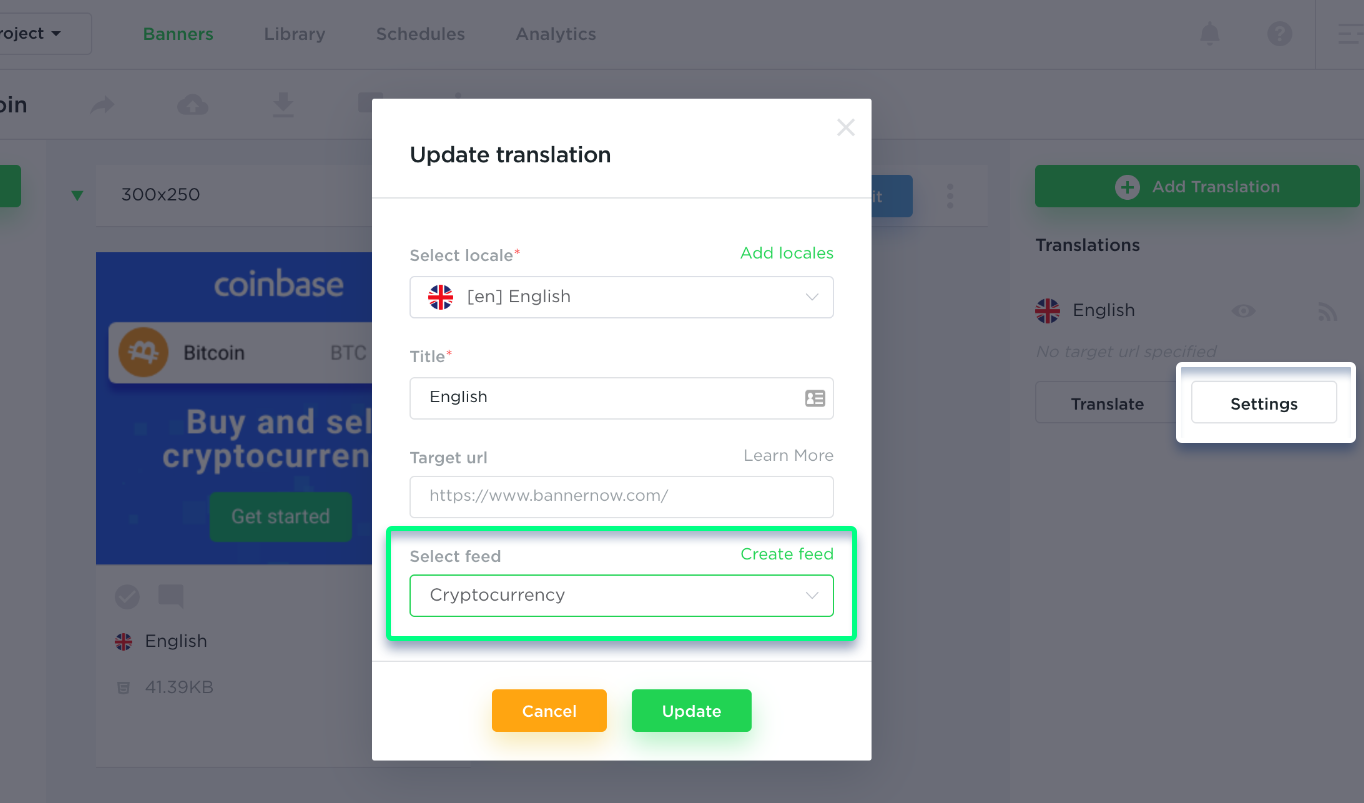
You can use a different feed for the translated banners within the same bannerset:
- Click the Settings button in the translation modal
- Select a different feed from the dropdown
- Click the Update button
After adding the feed to your bannerset you can create a new banner (or edit an existing one). To add a feeded source to the item inside the banner, do the following:
- Select the each item
- Click on the green Feed button
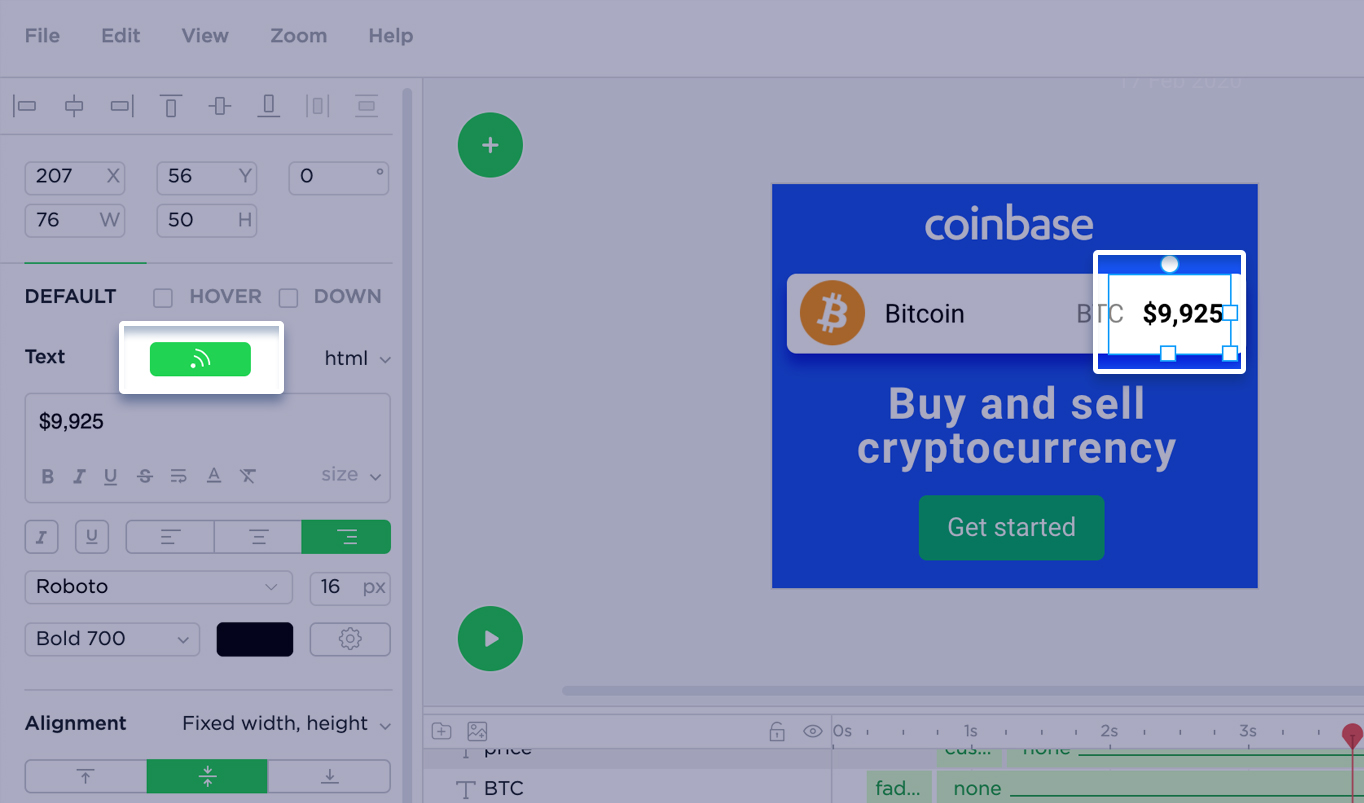
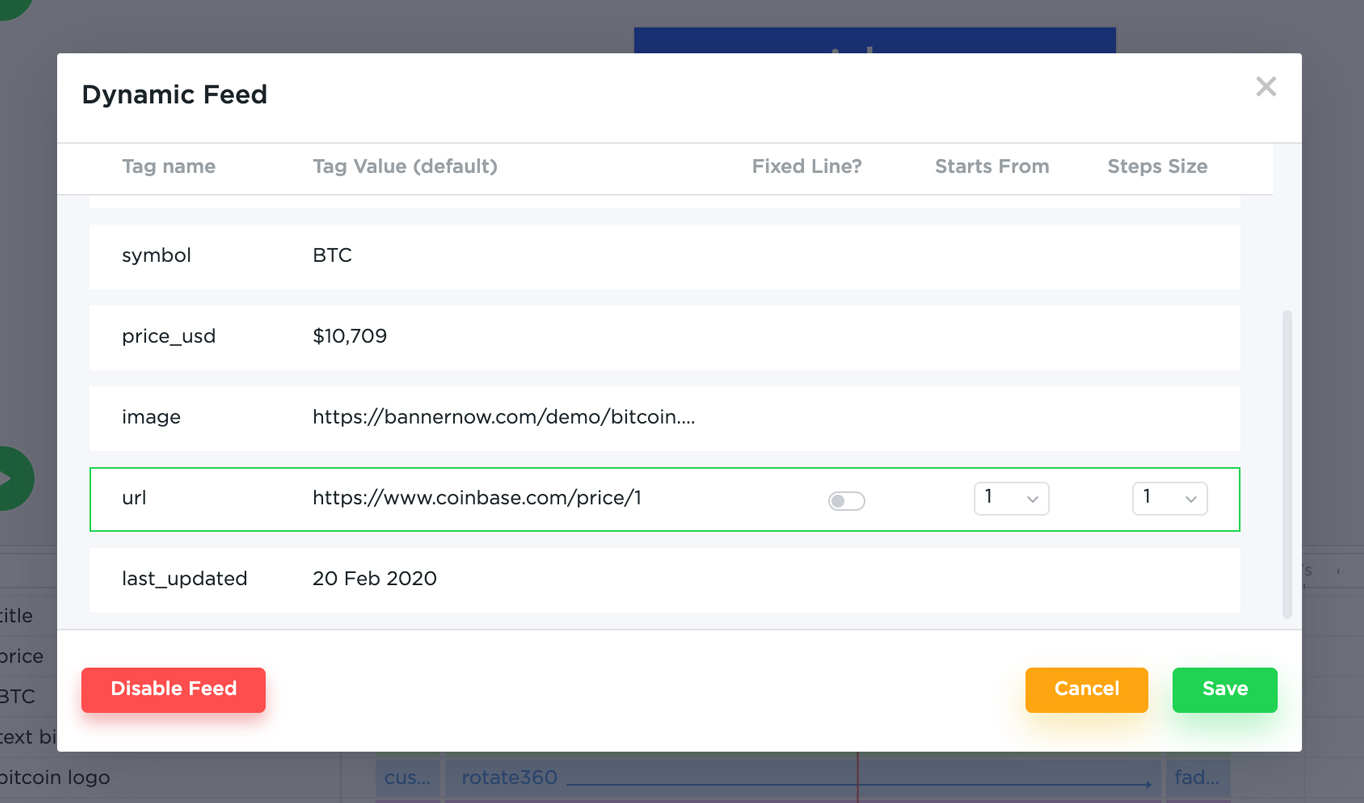
Select the field that you want to display. The fixed row slider can be used in case you need to display the data from a specific row only. Click Save to apply the feed to the item.

It’s also possible to connect the URL from the feed to the banner hyperlinks. To do this, go to canvas settings and set the feeded hyperlink to the whole banner or select an item and enable Hyperlink for it.
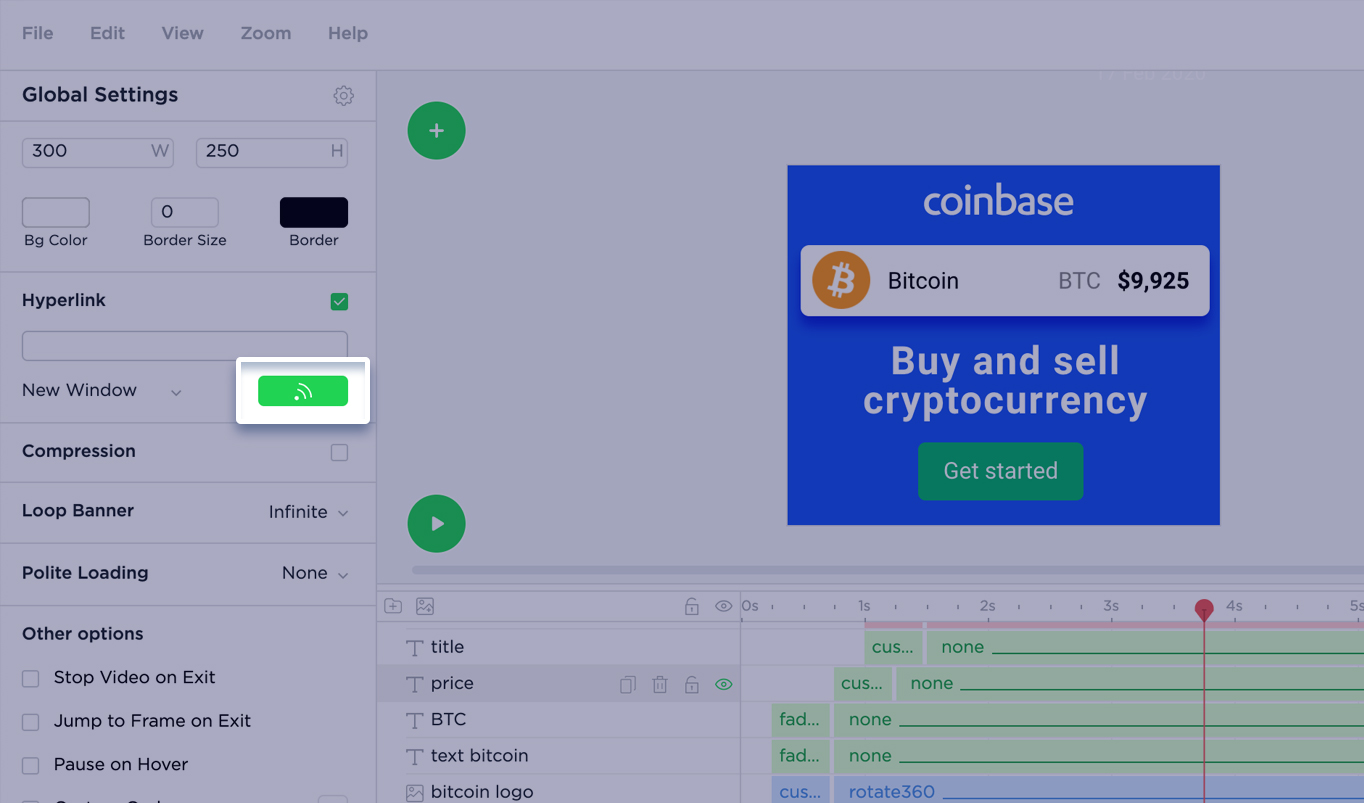
Select the field that contains the URL data format and click Save to apply the changes.
Save your banner and click Preview. You will notice that on each loop, the banner is taking the new data from the next row within the feed.
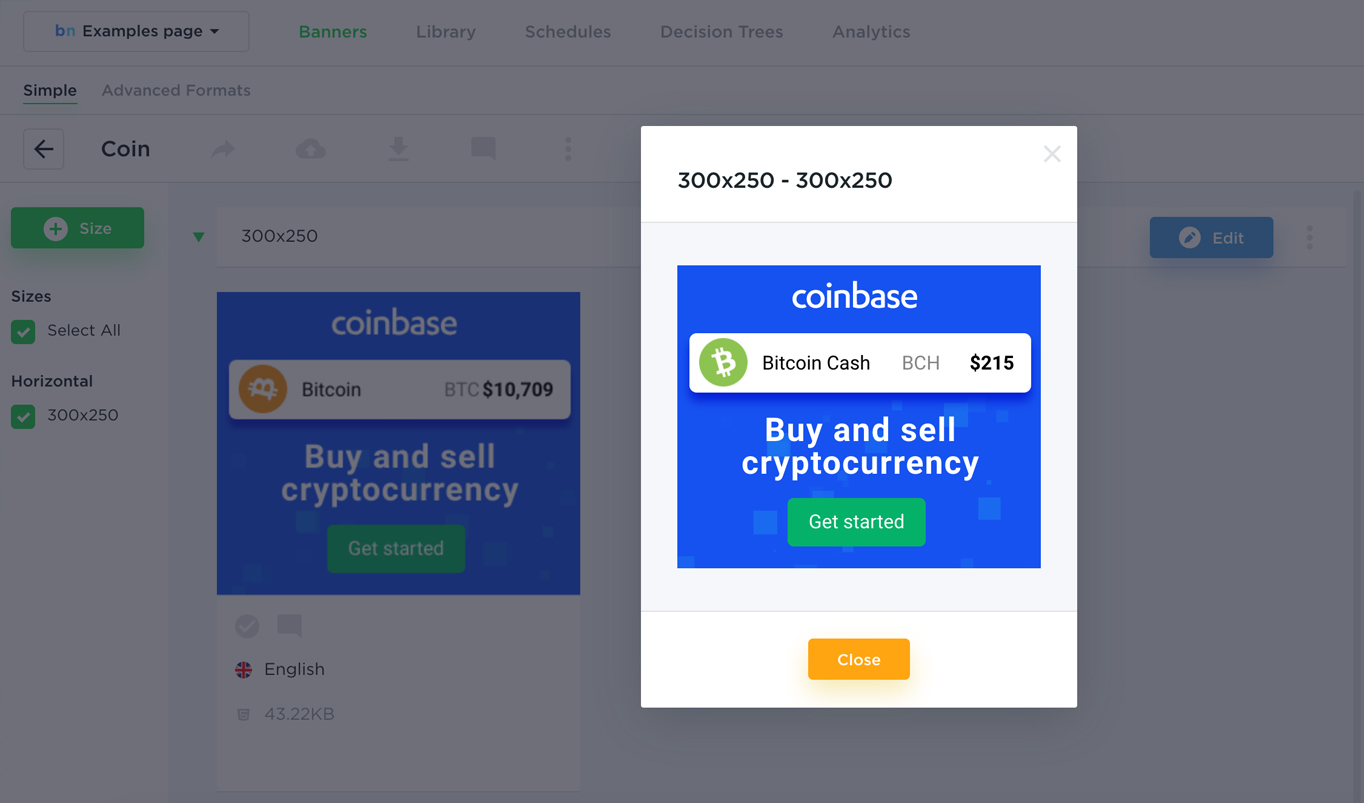
Now, you’re able to publish the banner to the ad network. When the feed data is updated, your banner will always display fresh data.
Showcase Example https://bannernow.com/html5-banner-examples