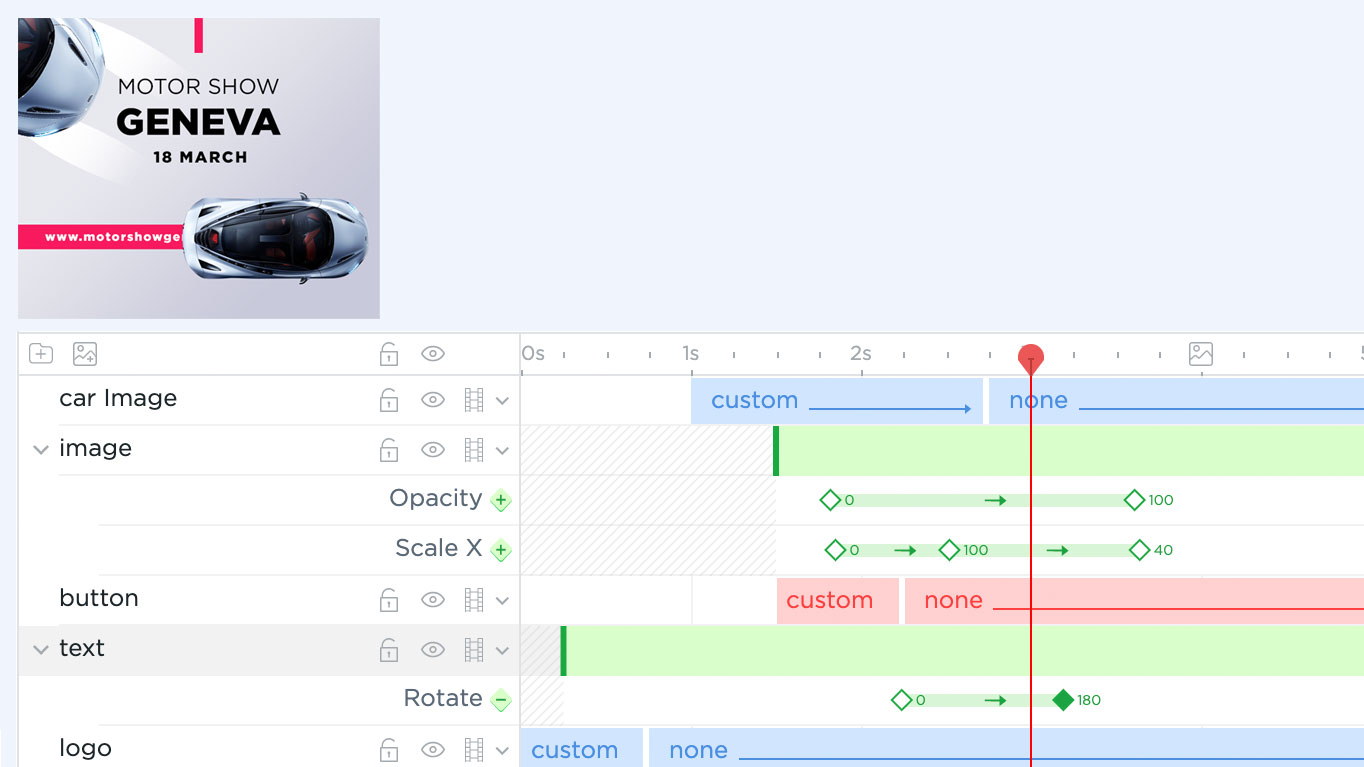
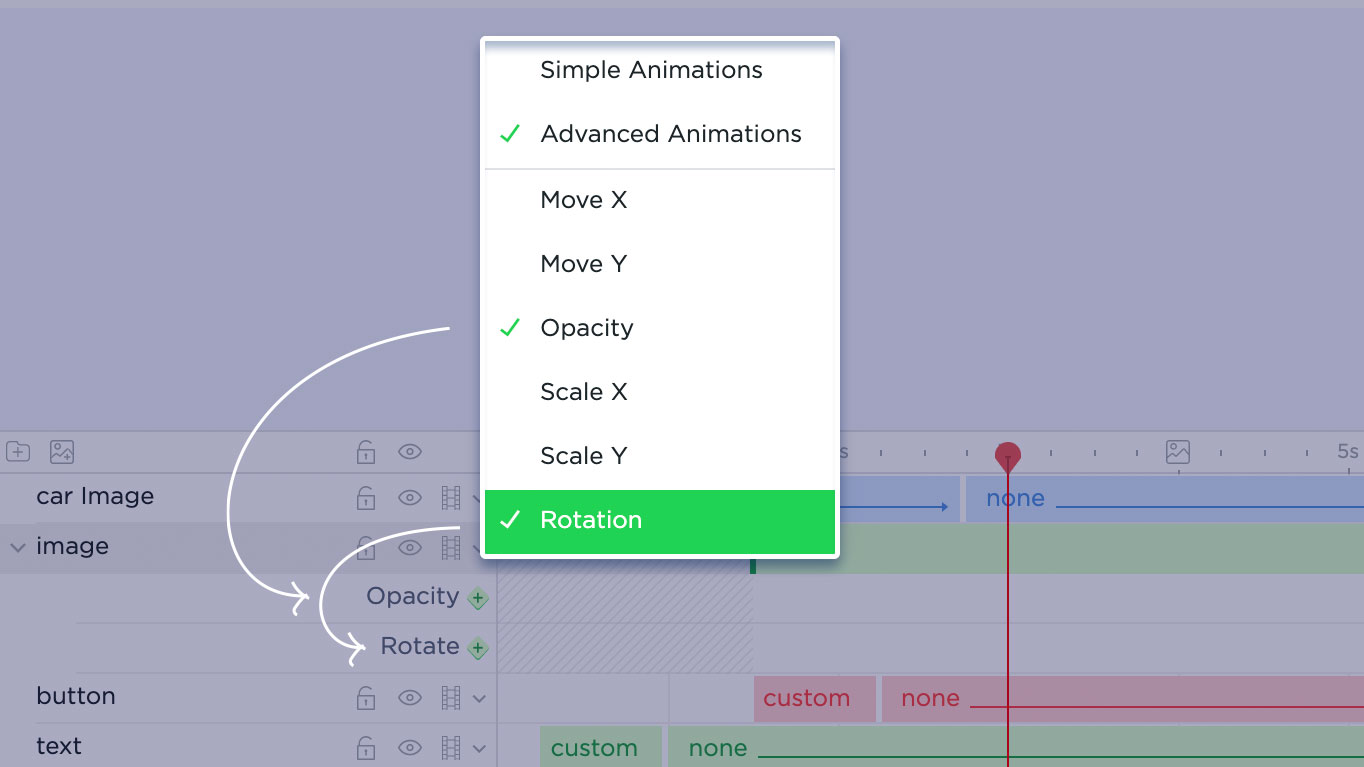
In advanced animation keyframe mode each property of the element (move x, move y, scale x, scale y, opacity, rotation) can be animated separately using keyframes.
To enable the keyframe mode – click the “animation” icon on the layer.
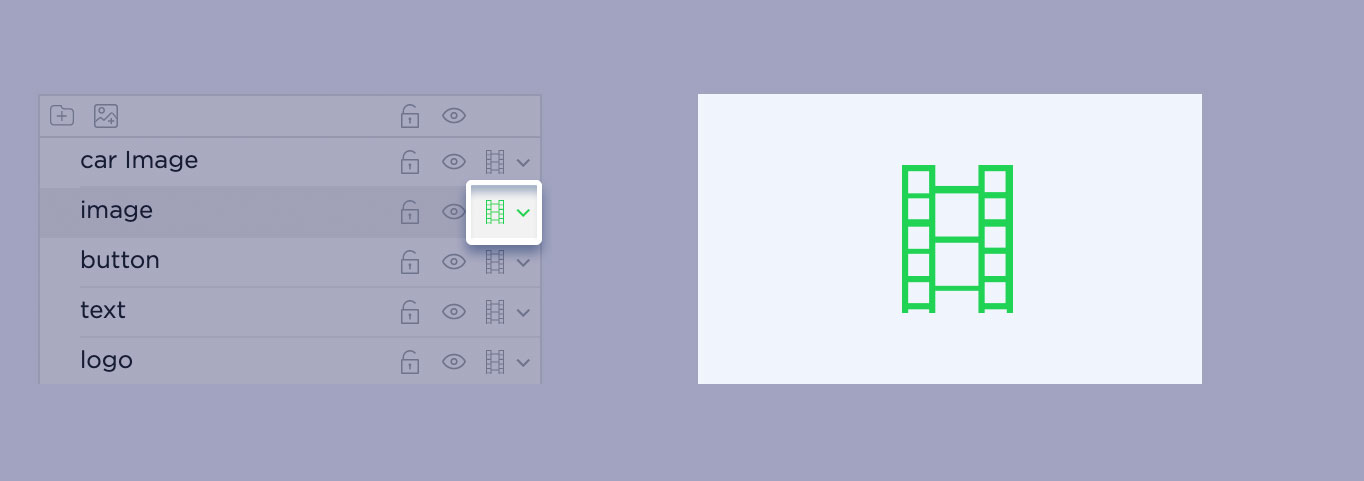
Select all the properties you want to animate for this layer from the menu.
Animation properties that are selected will appear right under the selected layer
Keyframes represent a specific value for properties (position, scale, opacity, rotation) in time.
Keyframe animation means that animation will transition from one keyframe to another and animate a specific property (ex Opacity, Move X).
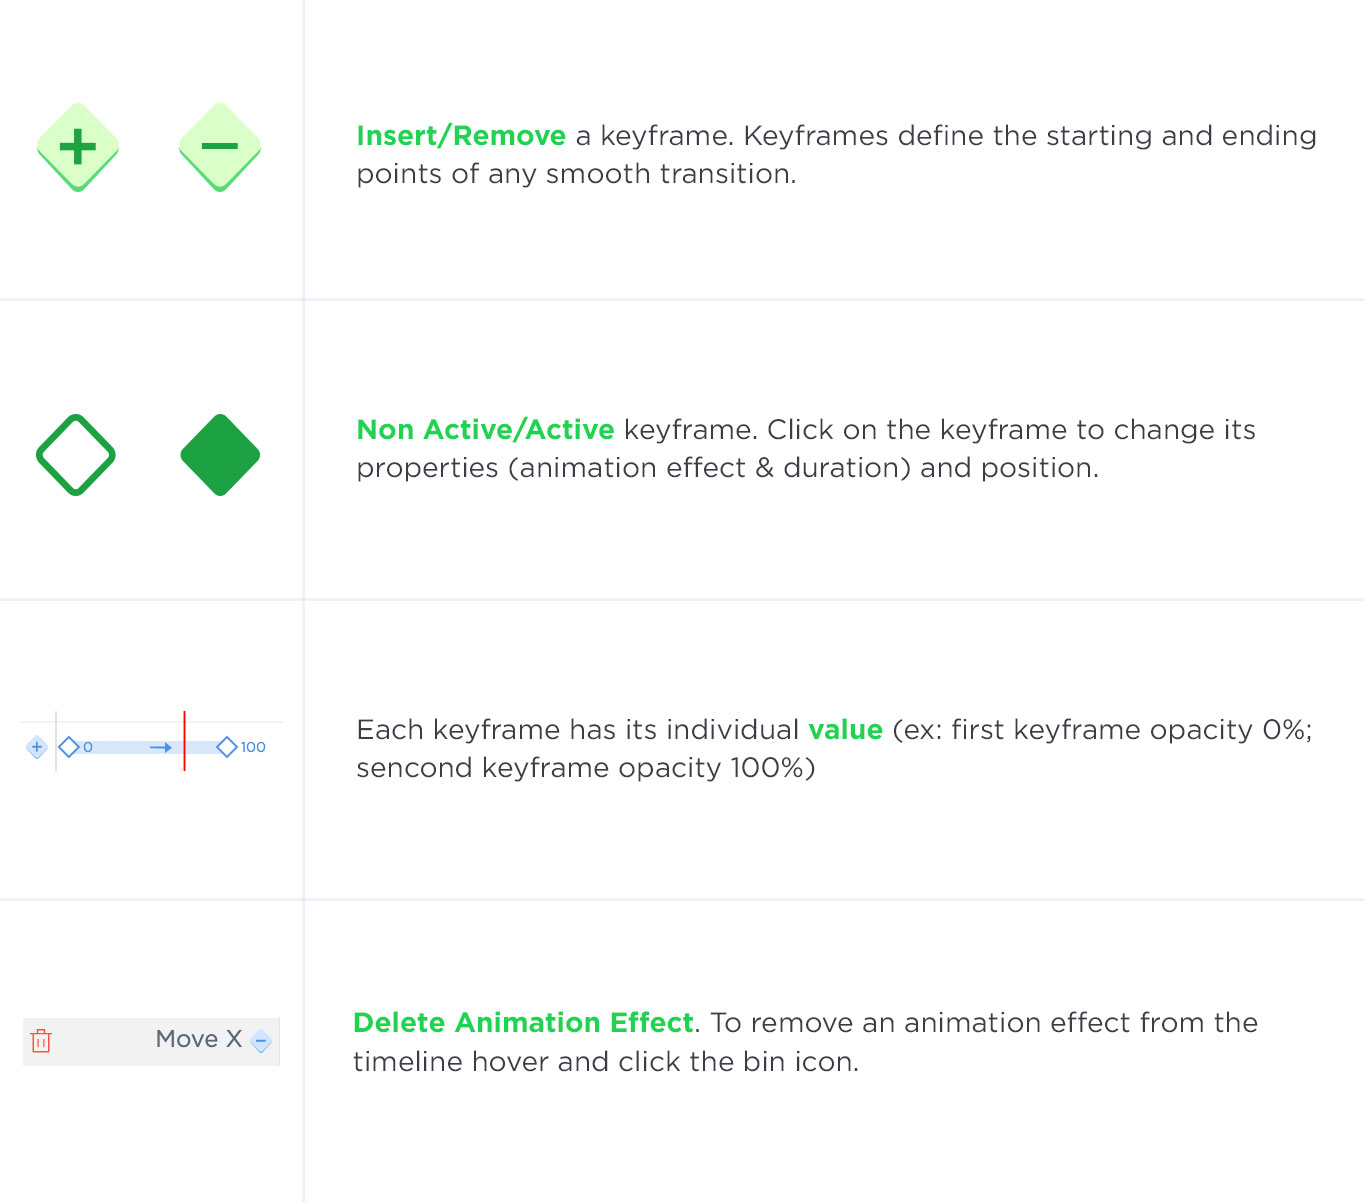
For example if you have 3 keyframes on item’s opacity animation:
1st keyframe – 0s, value 0%
2nd keyframe – 1s, value 100%
3rd keyframe – 5s, value 50%
This means that opacity will start animating on 0s from 0% to 100% (animation duration 1s).
Then it will animate from 100% on 1th second to 50% on 5th second (animation duration 4s)
Keyframe can be added by clicking the plus rhombus shape or double-click right on the timeline (or you can double-click on the timeline where you want create a keyframe).
Click on the keyframe itself to edit it’s value.
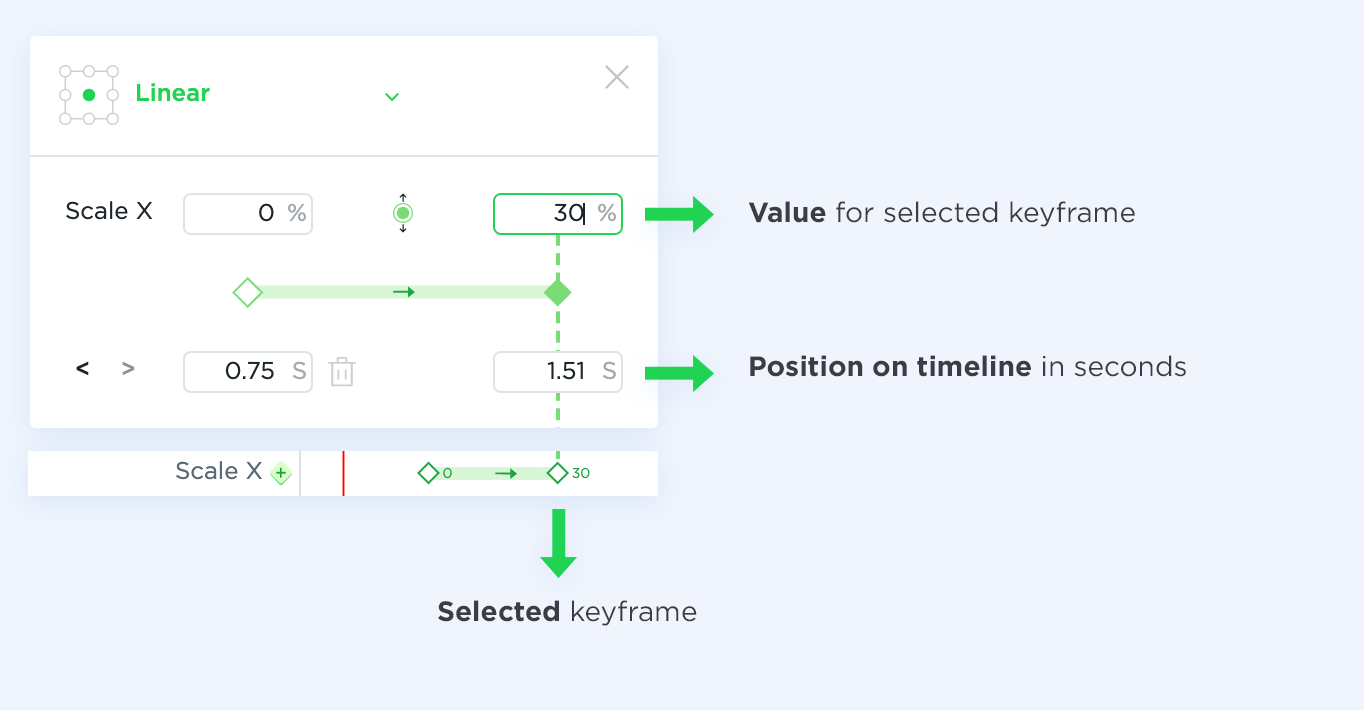
To make your animation more realistic, you can add easing by selecting one in the keyframe properties top dropdown menu.
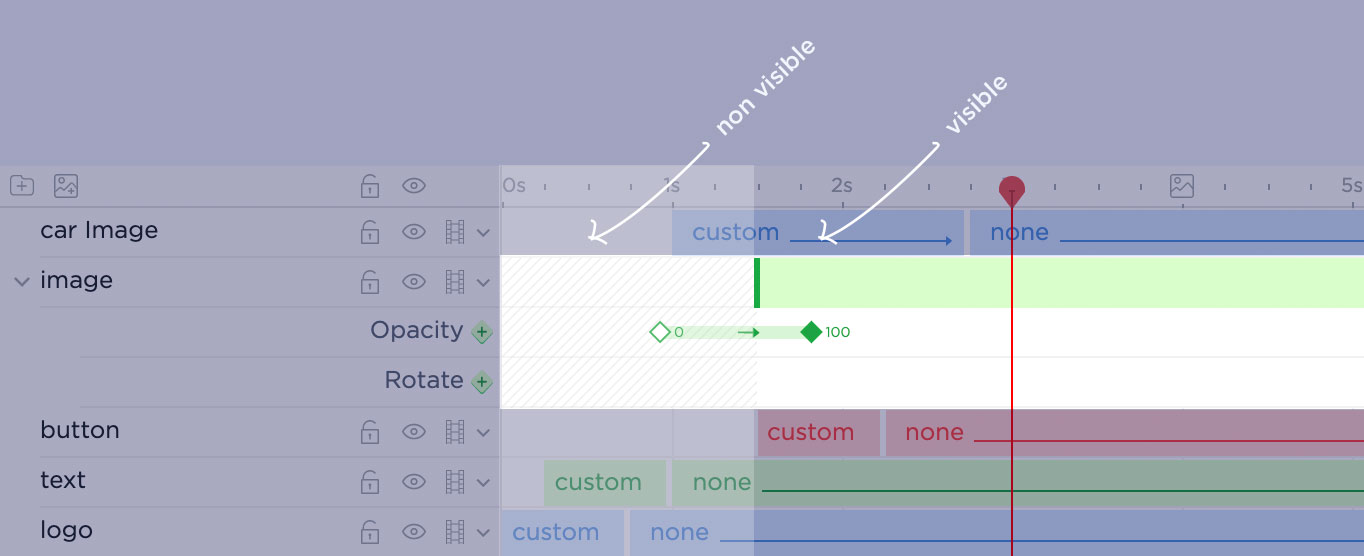
You can also add keyframes on the “non visible area” to make the start animation before item becomes visible. The non visible/hidden area has a pattern overlay.