A decision tree is a powerful tool that allows you to create a systematic and visual way of making decisions. In the realm of digital advertising, decision trees are particularly useful for optimizing ad campaigns by showing different ads to different users using the same Ad Tag/Embed code.
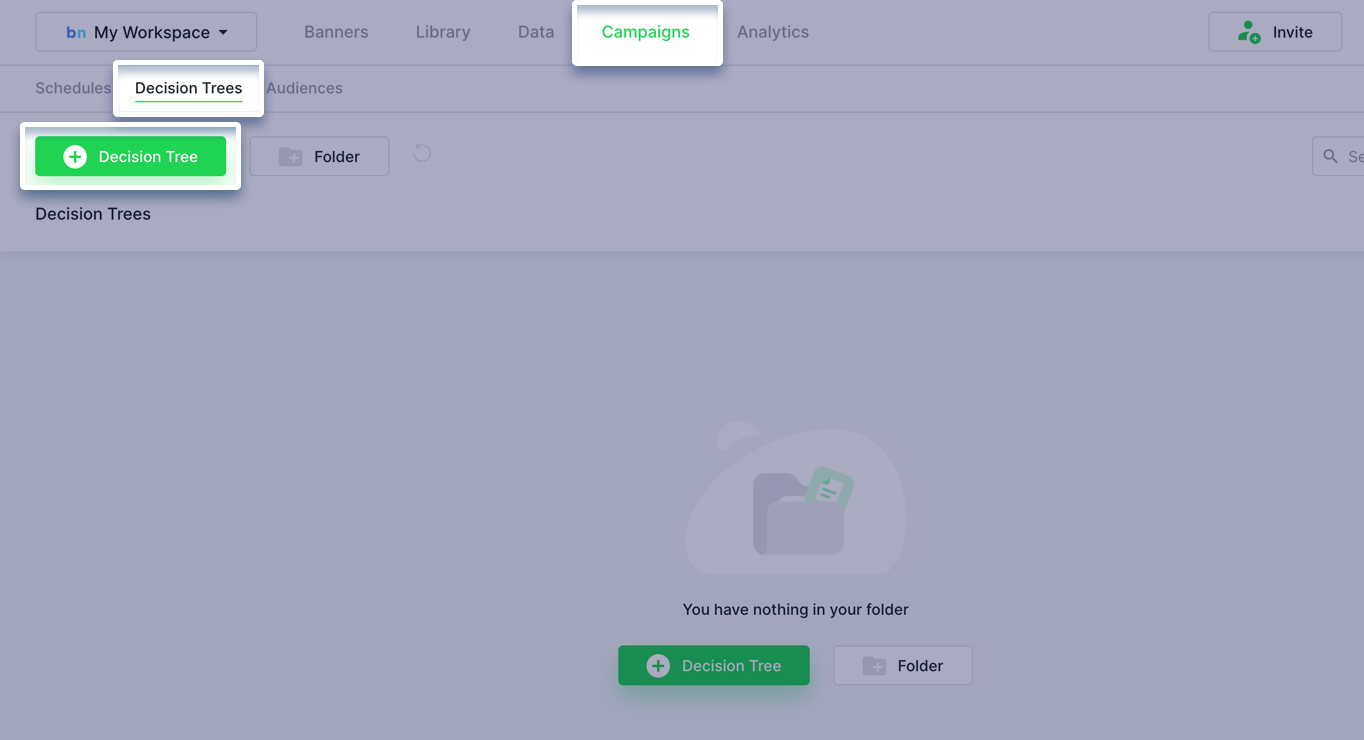
1. Let’s start by clicking on the Campaigns menu, Decision trees tab and Create New Decision Tree button.
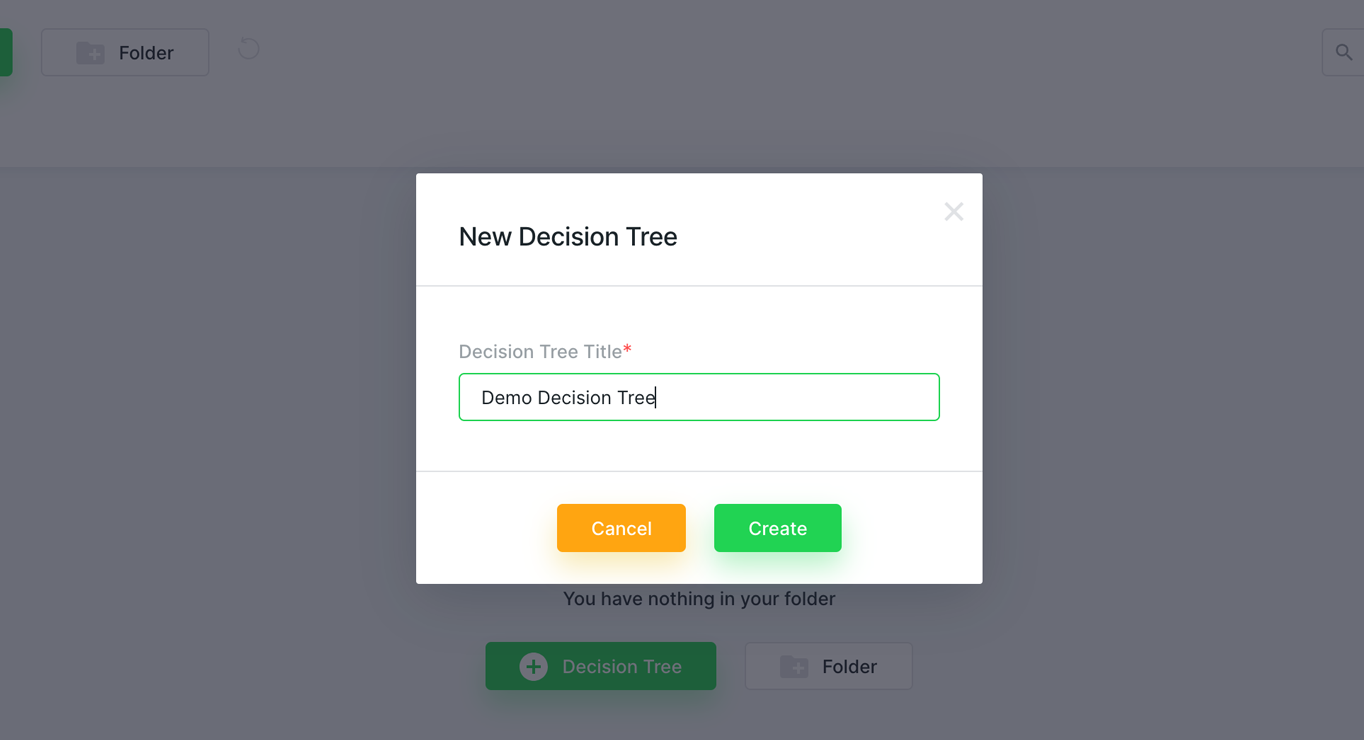
2. Rename the Decision Tree title and click Create.
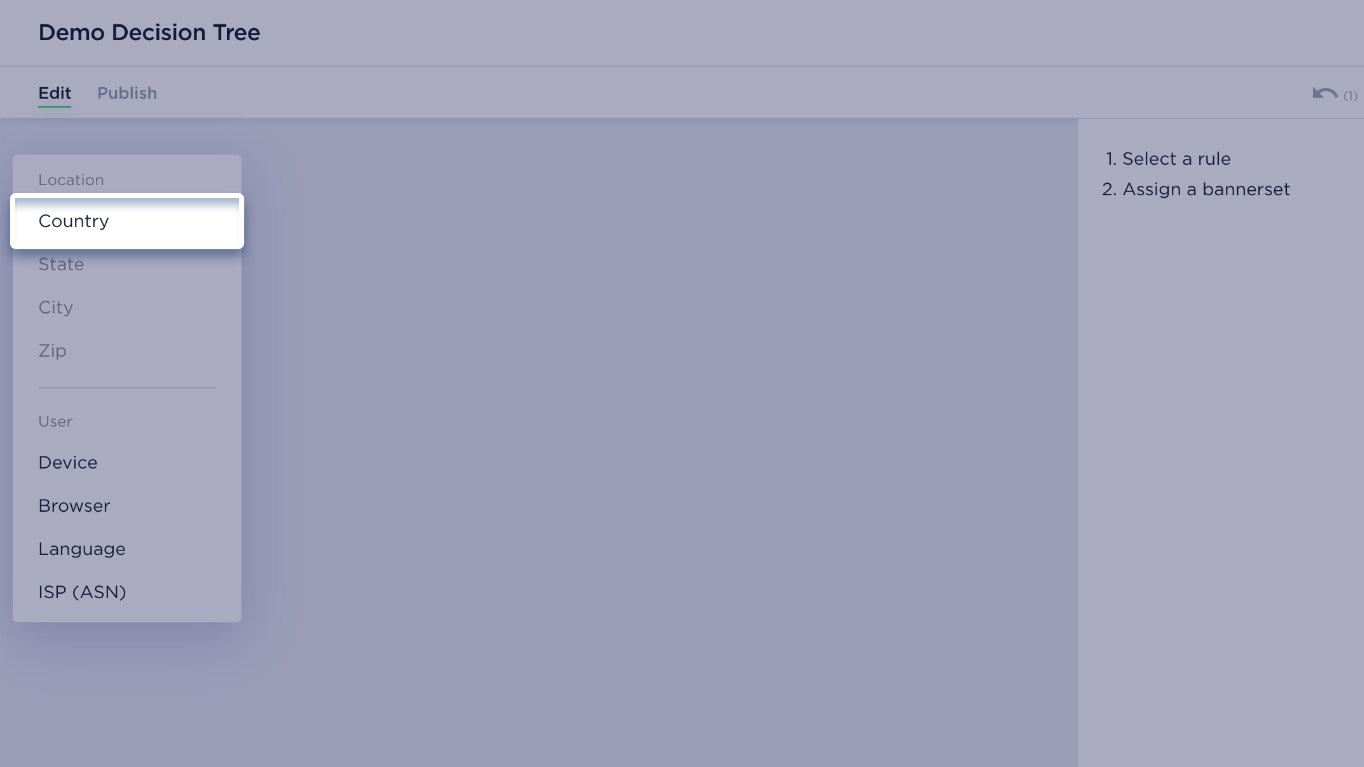
3. On the left side of the decision tree interface, you’ll find a list of dynamic conditions that you can use to create rules for displaying different creatives to different users.
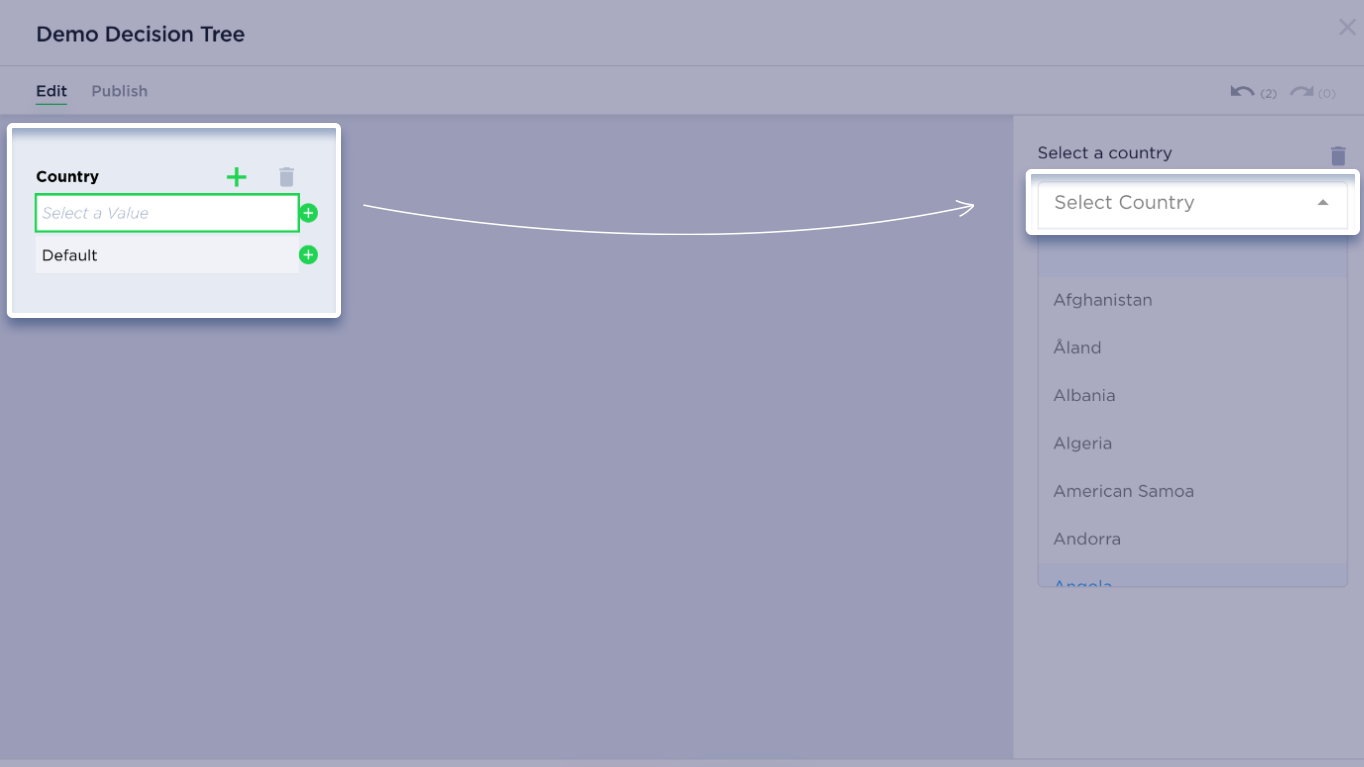
Let’s walk through an example: select Country.
4. Once you’ve selected Country, you can choose from a list of available countries in the dropdown menu. Simply select the country you want to create a rule for, and the decision tree interface will guide you through the process of assigning creatives variations for users from that country.
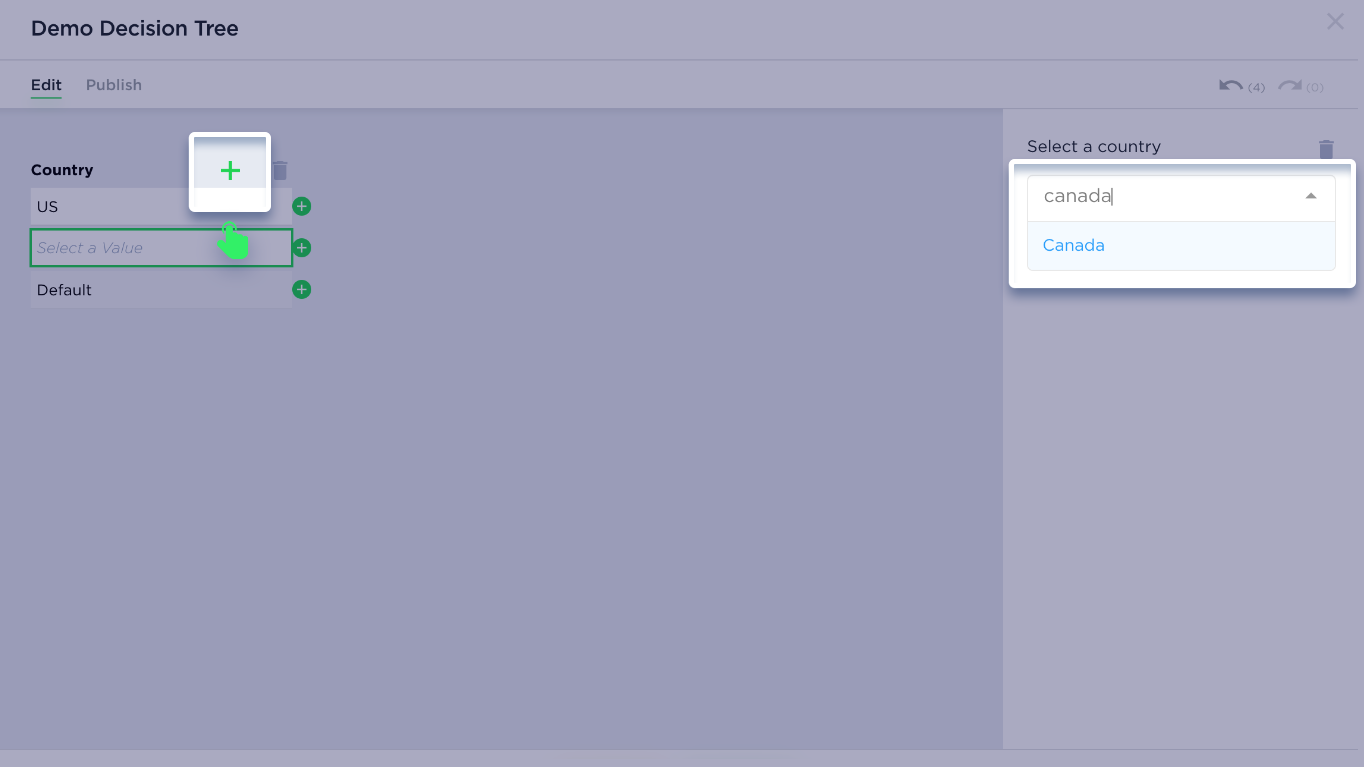
5. To add a new decision node for another country, click Plus and from the drop down menu select another country.
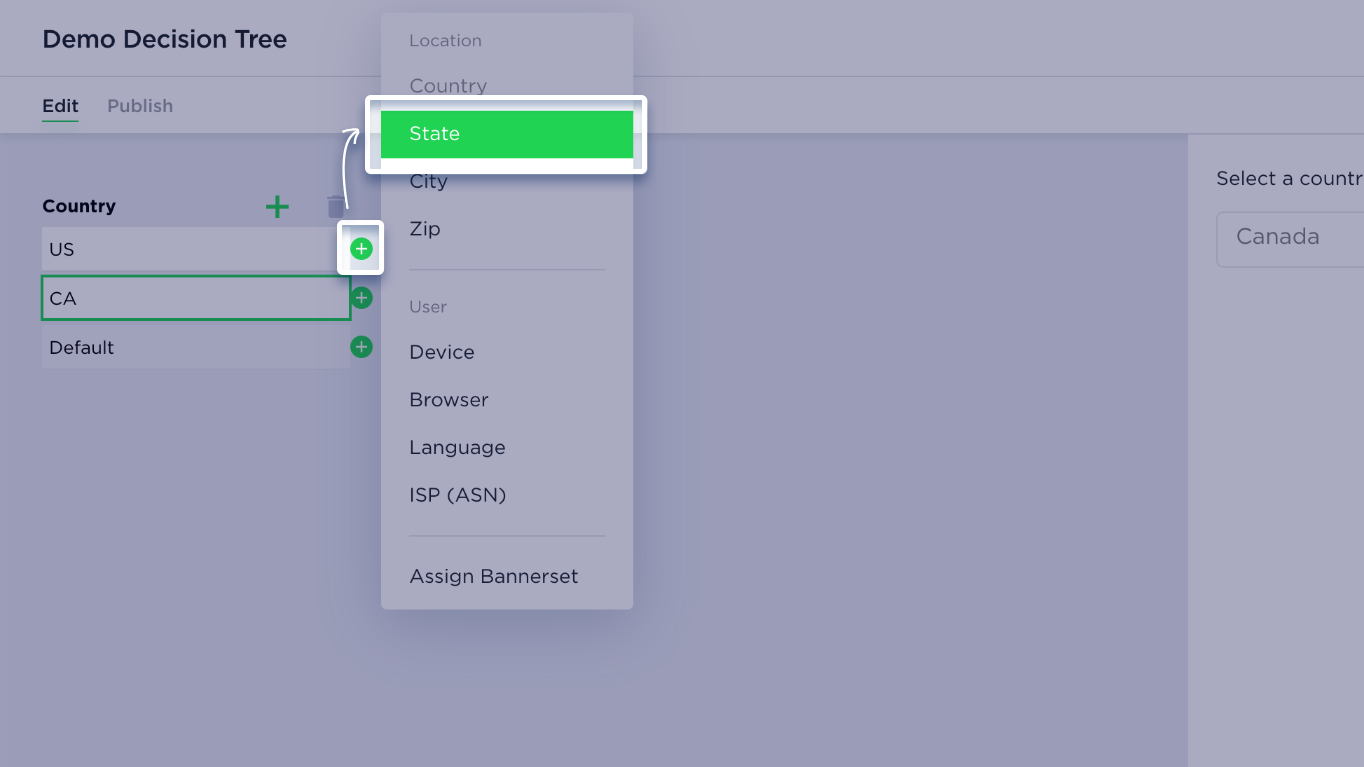
6. A key advantage of using a decision tree is its flexibility. You can tailor your ad campaigns to specific audiences by adding even more granularity, such as targeting users based on their state.
To do this, simply click the Plus icon next to the country and select State from the dropdown menu. This allows you to create rules based on the user’s state.
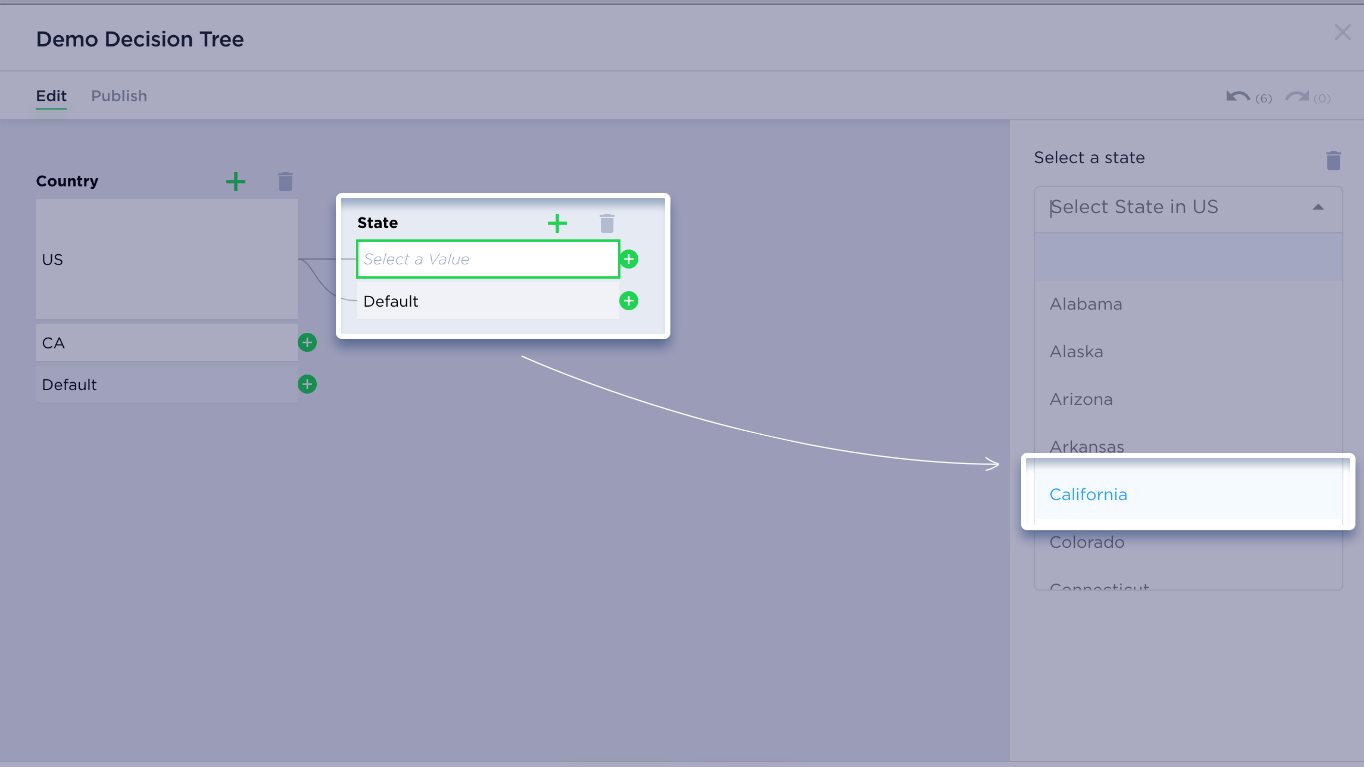
7. From the dropdown menu (on the right side) select a state (for example California). This means that your show a specific ad to people from California.
8. You can also add City, Zip, Device, Browser, Language and ISP rules.
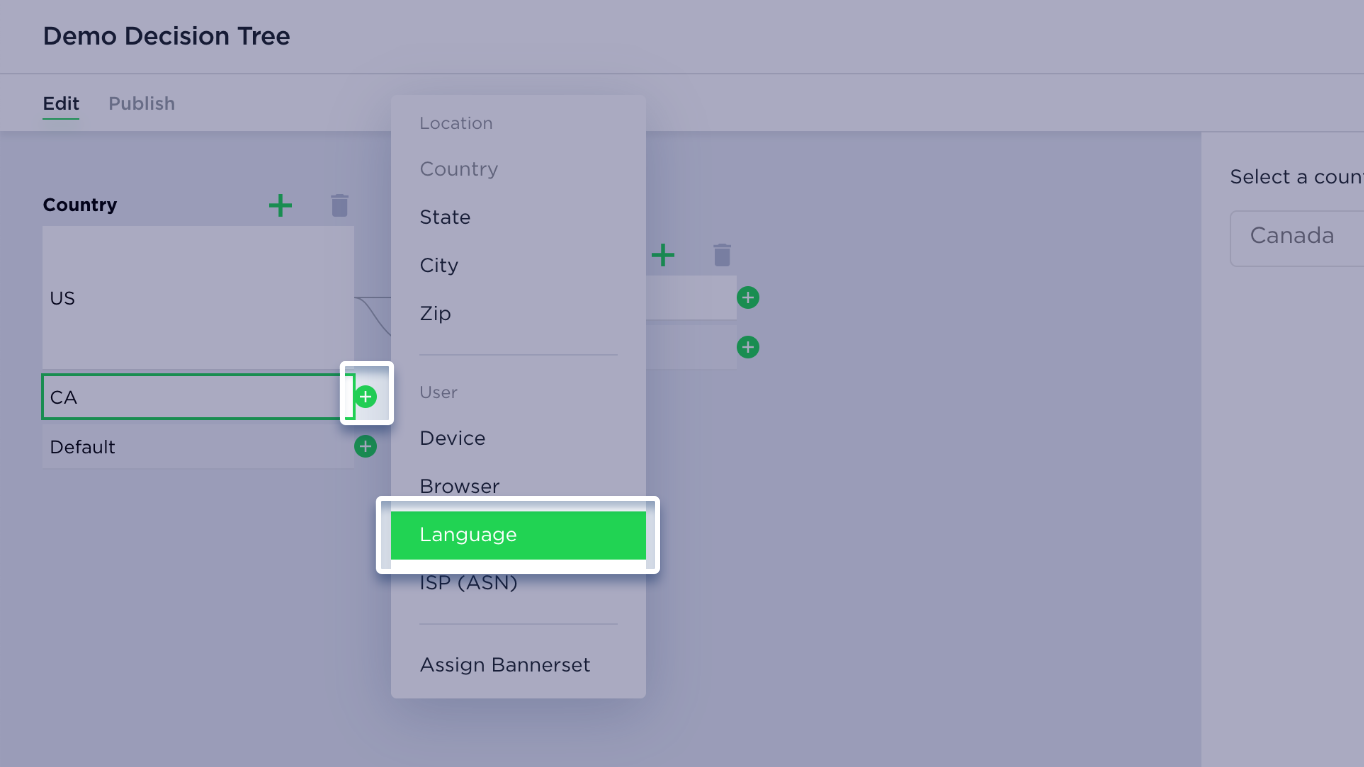
9. Let’s add a language rule. As we did before, set up your languages from the dropdown menu.
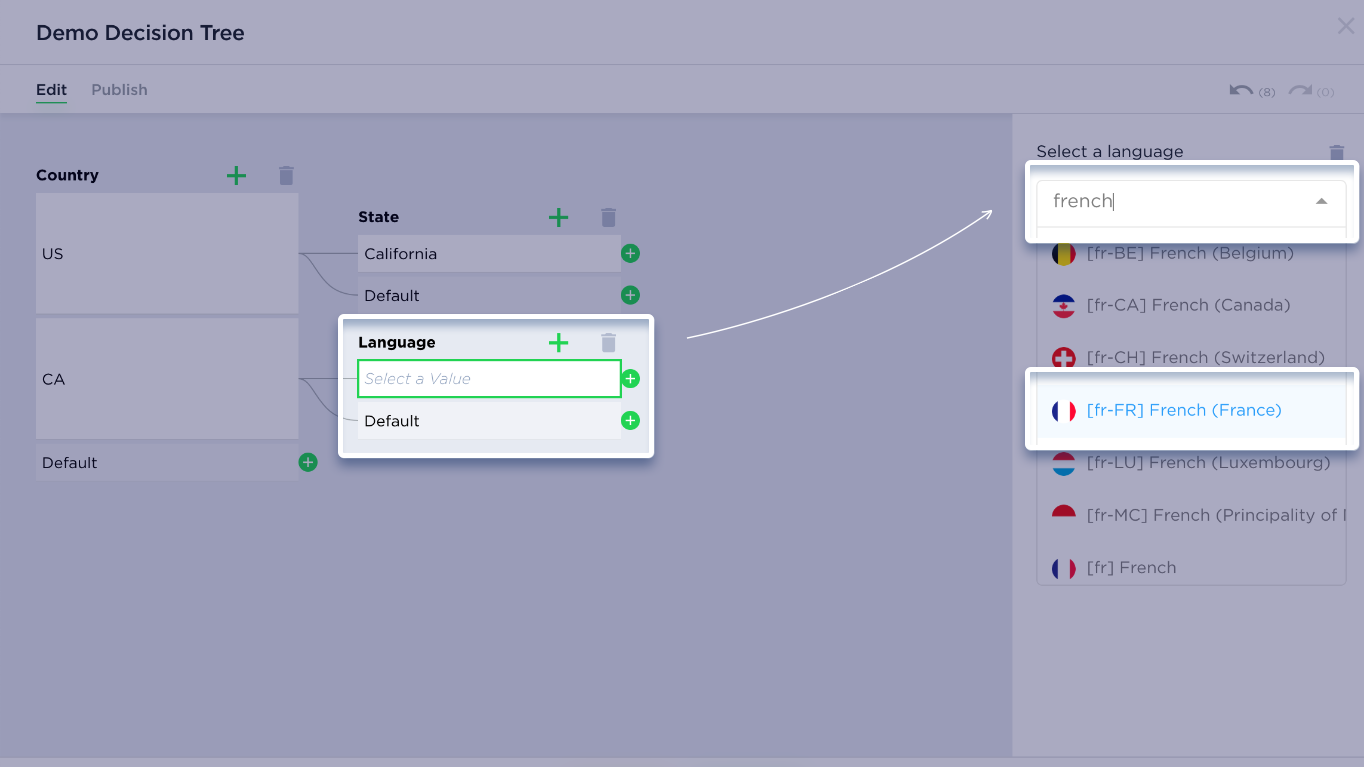
10. By adding multiple languages to your decision tree, you can ensure that users see ads in the language they prefer, resulting in a more personalized and effective ad experience.
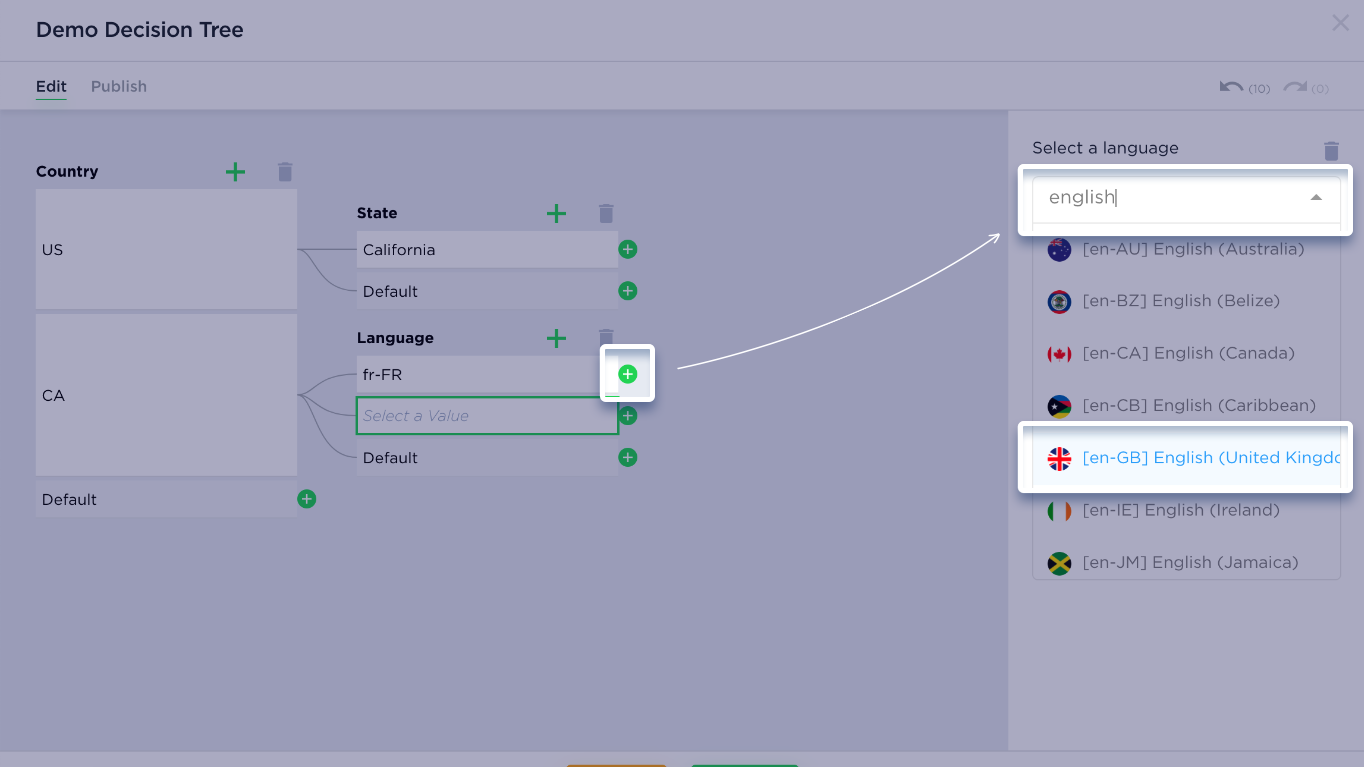
To add another language, simply click on the Plus icon and select languages from the dropdown menu.
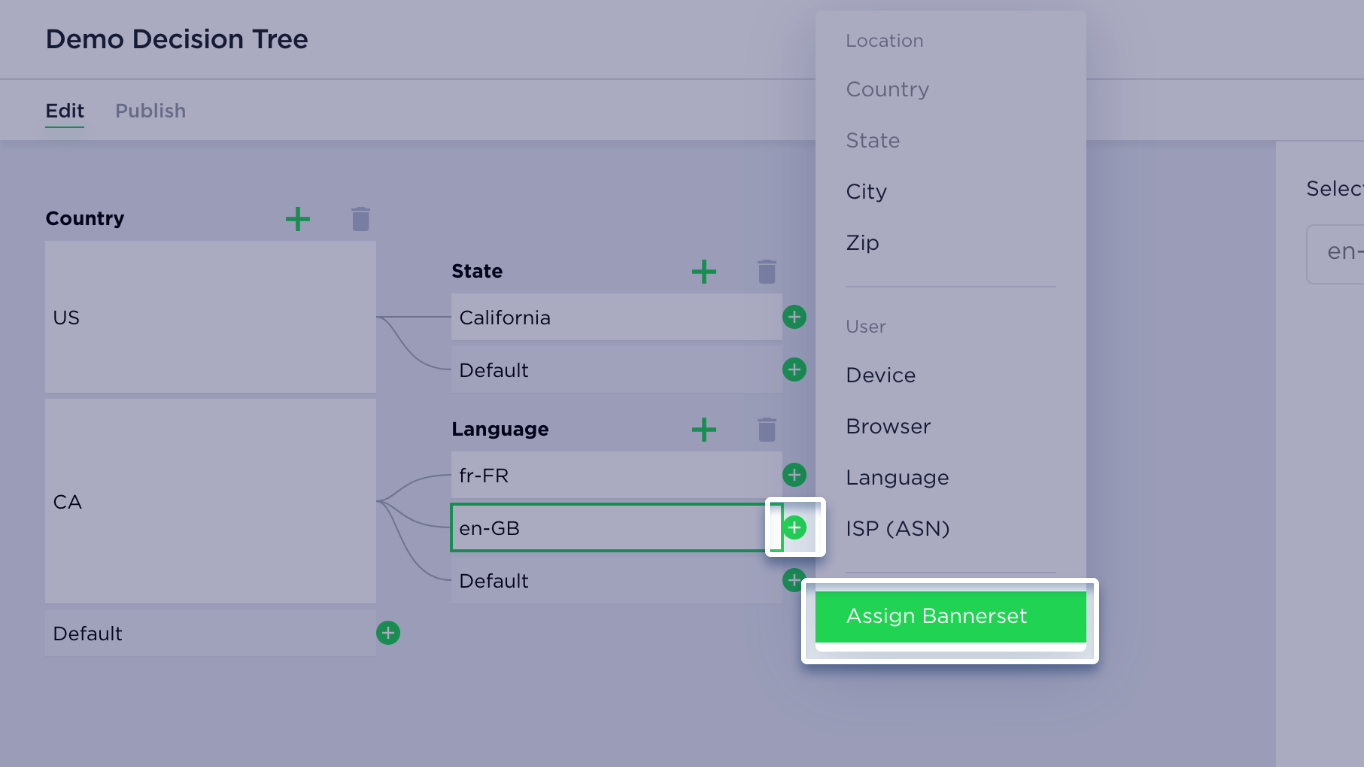
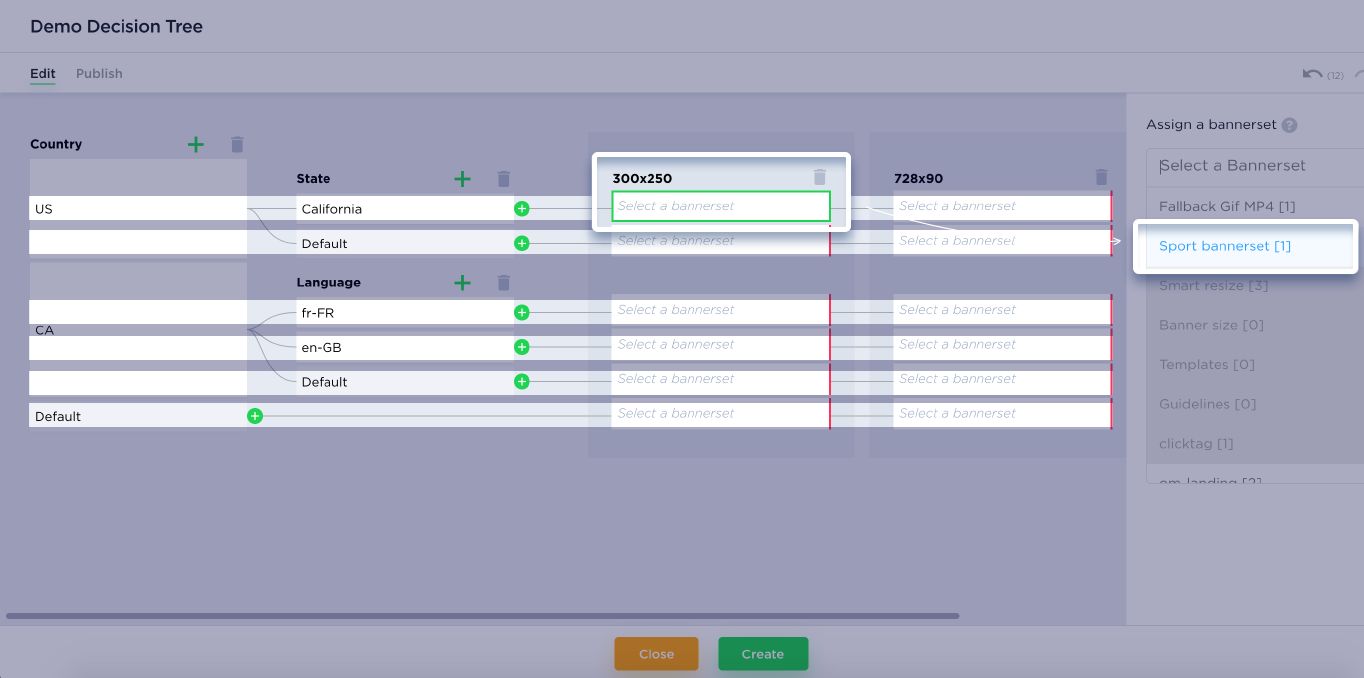
11. Now, let’s assign creative sets to which these conditions/rules will be applied.
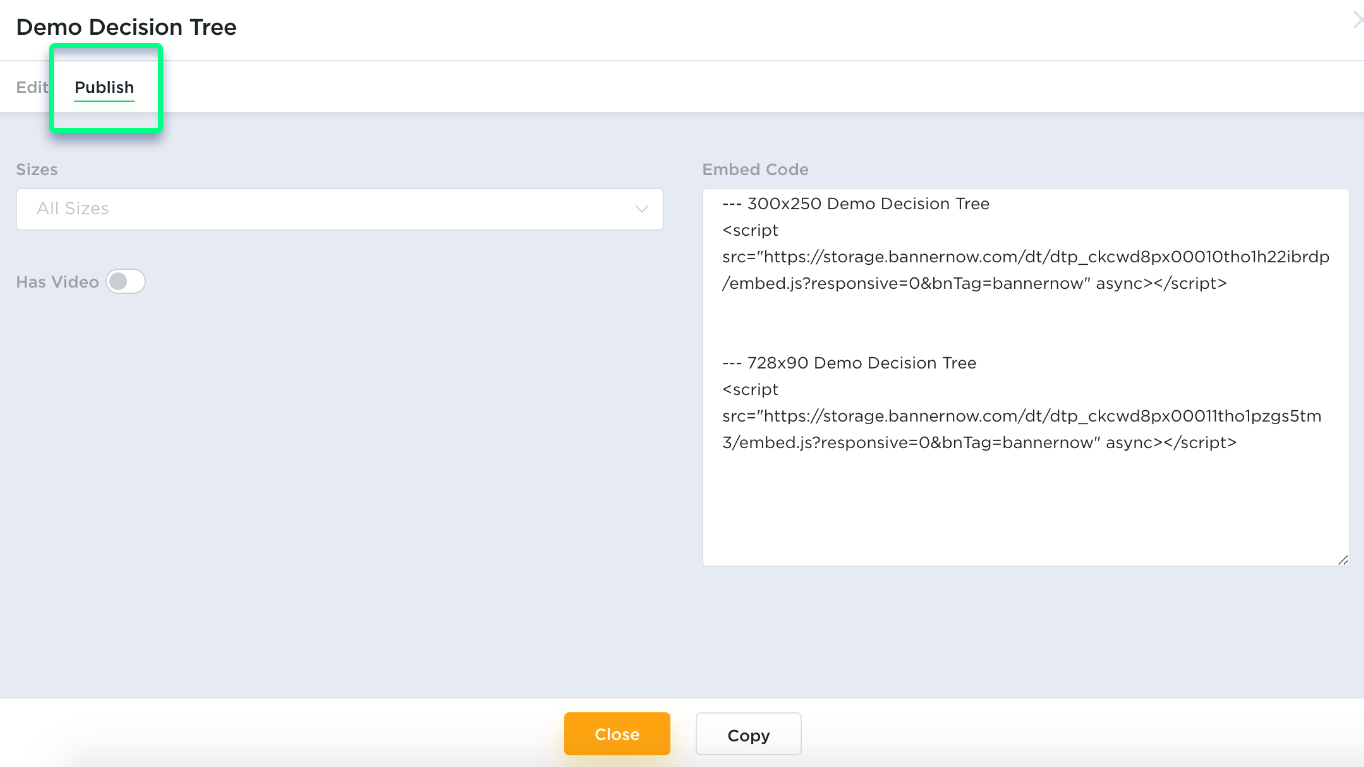
12. Choose the creative sizes you want to include and click Add. Once you publish your decision tree, an embed code will be generated for each size you’ve selected.

13. Assign a creative set for each rule in your tree. For example for country United States and state California for 300×250 container select Bannerset1 and for country Canada and language fr-FR for 300×250 select Bannerset2 and so on…
14. After assigning creative sets to all rules go to the Publish tag to see the Ad Tags / Embed codes for your placeholders.